Configure Form Security for Accounts Payable Access
Objective
This SOP explains how to configure form security so a user or security group can access Accounts Payable forms. It covers filtering the correct forms, assigning the appropriate access level, and applying the changes.
Key Steps
1. Open Form Security and identify the target security group 0:00
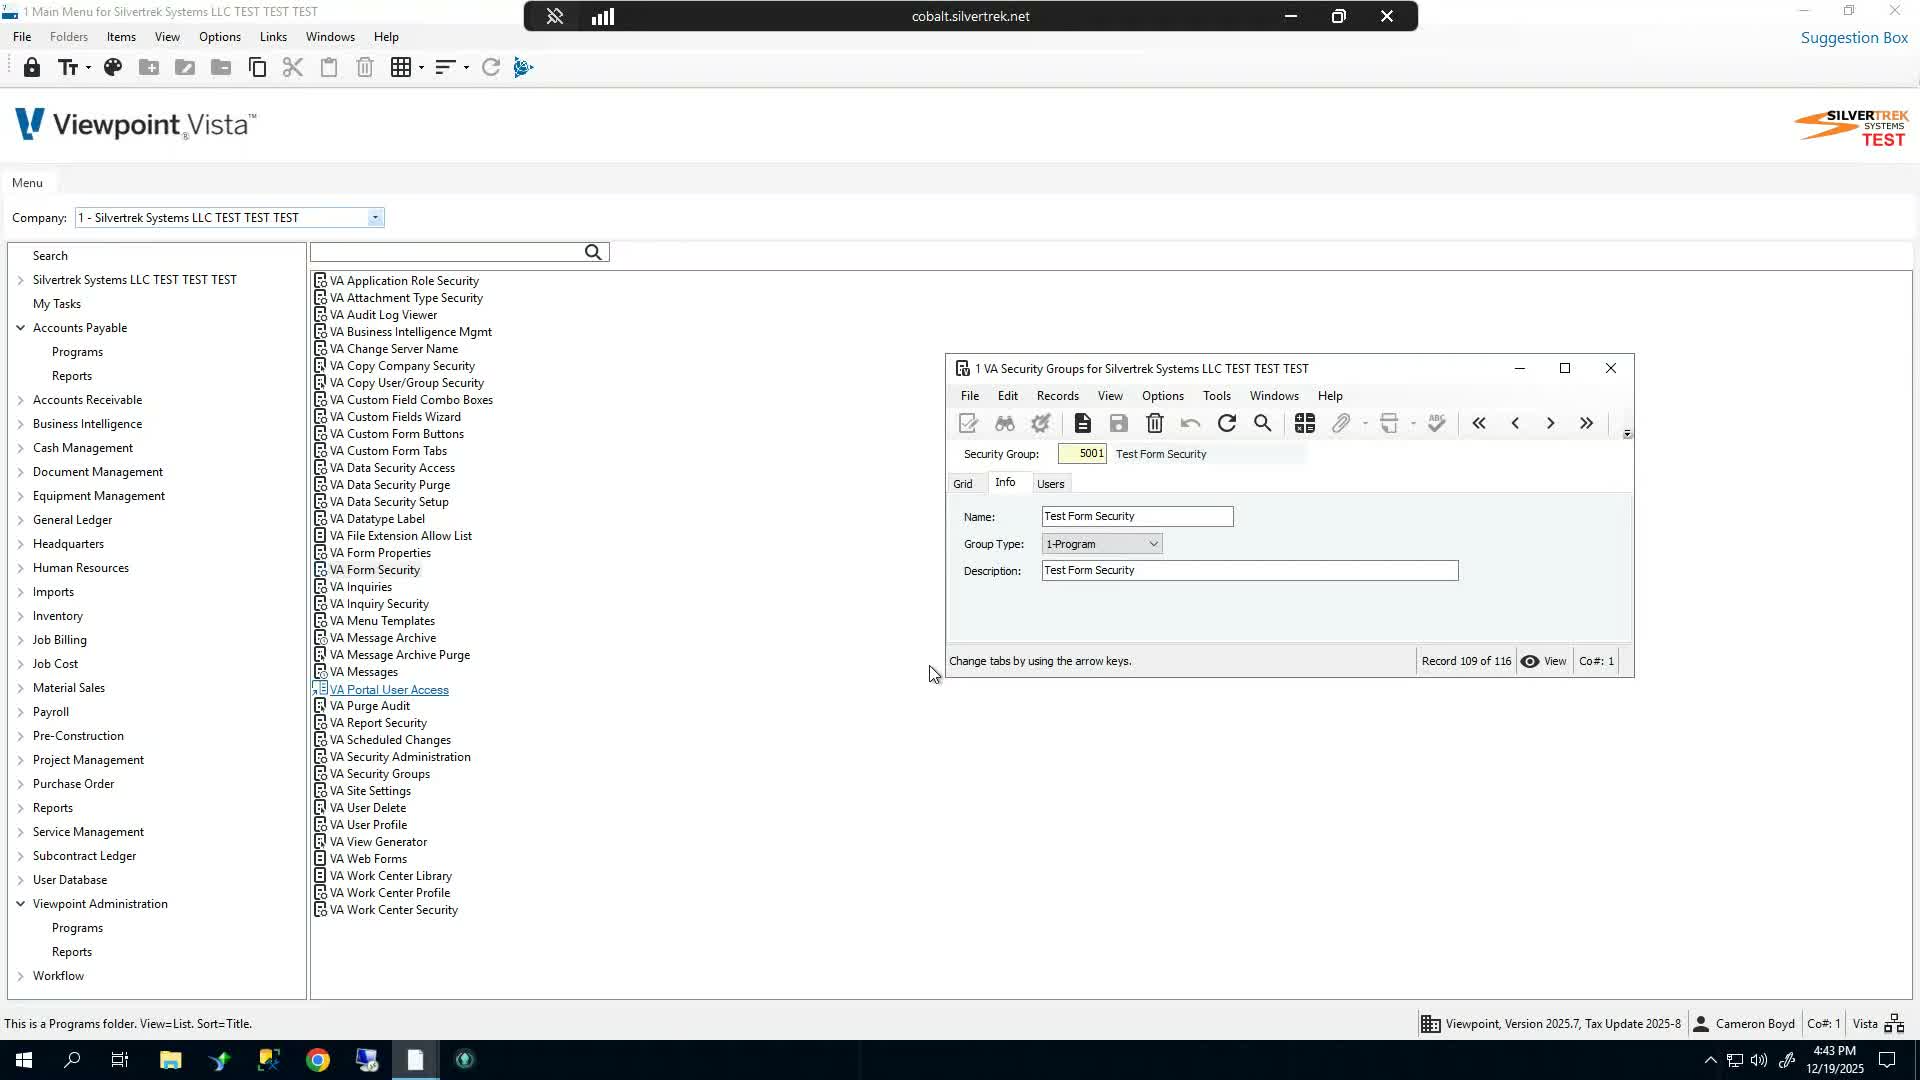
Open the Form Security setup screen.
Confirm the security group you want to configure (example shown: 5001).
Verify the user profile currently has no access configured for the target forms.
2. Review current access to Accounts Payable forms 0:28
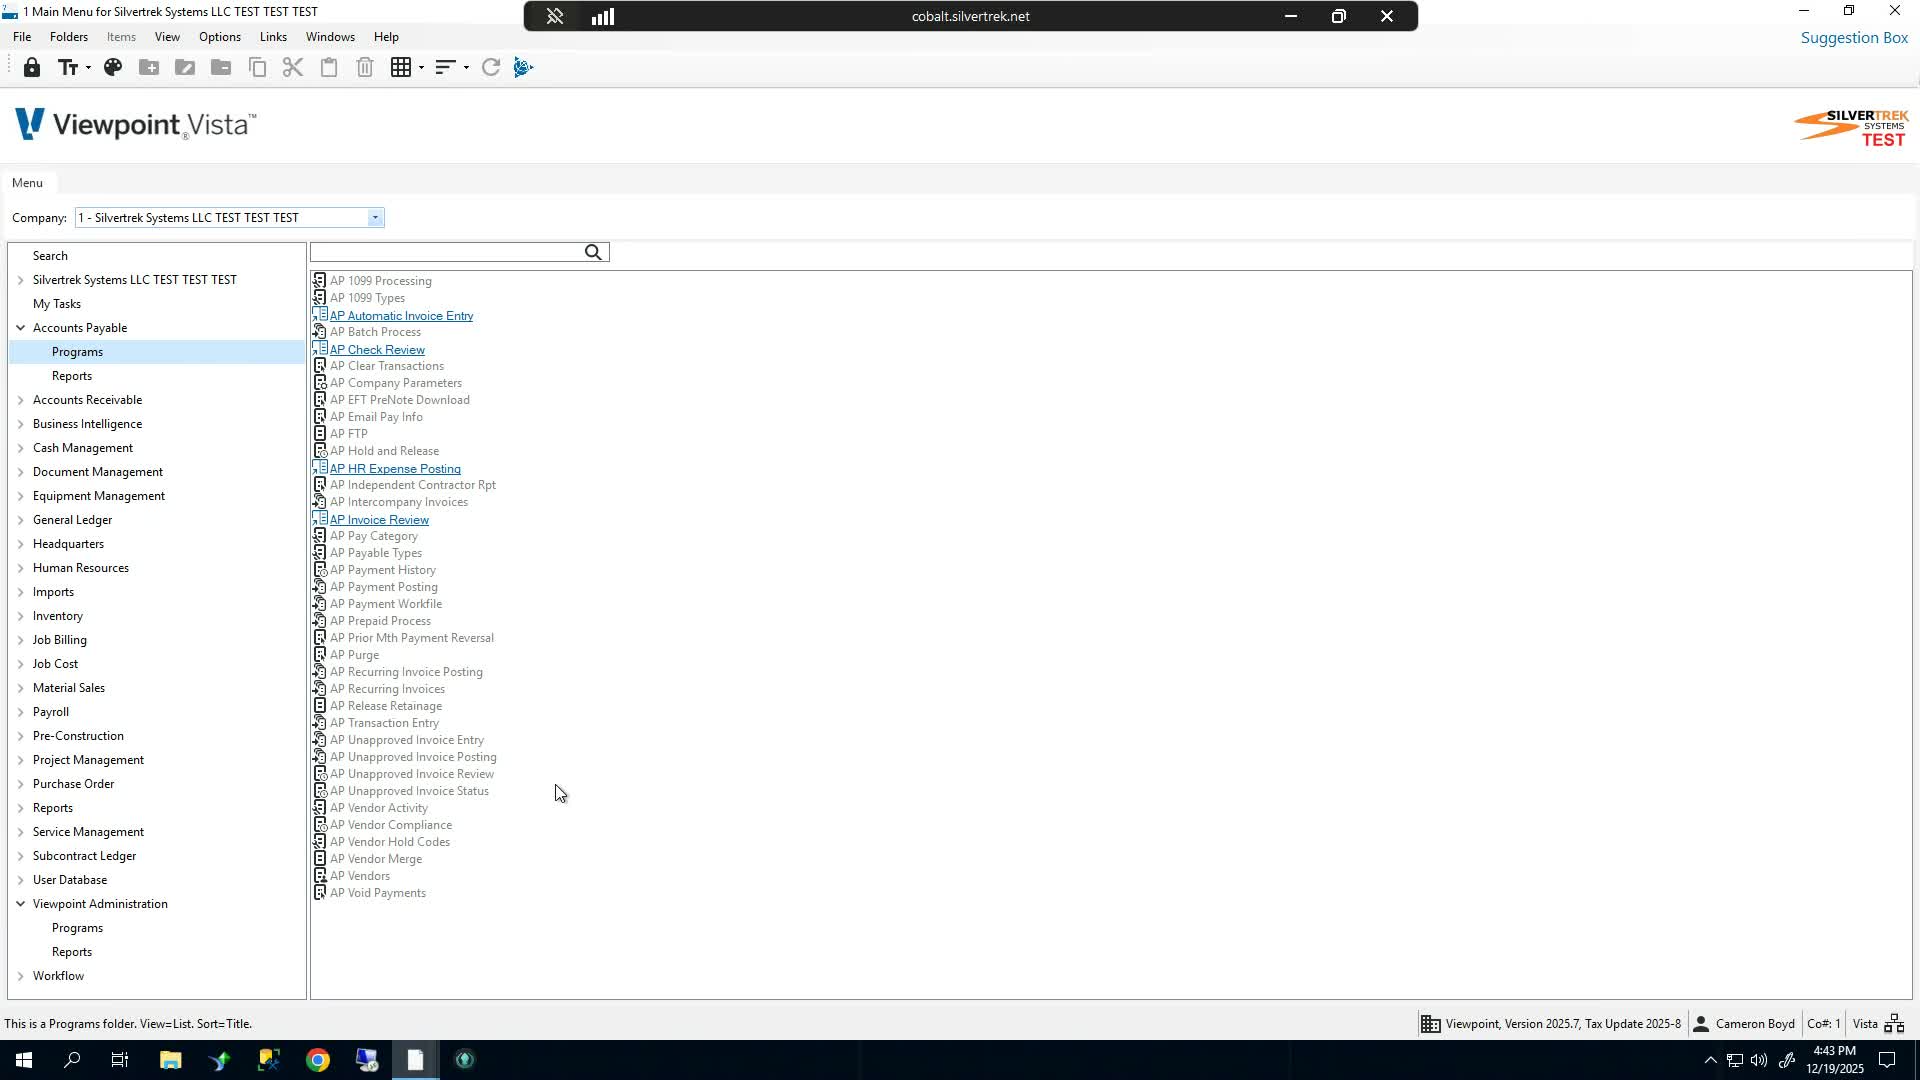
Navigate to the Accounts Payable programs/forms.
Observe which forms are currently unavailable or greyed out.
Use this as the baseline to confirm access changes later.
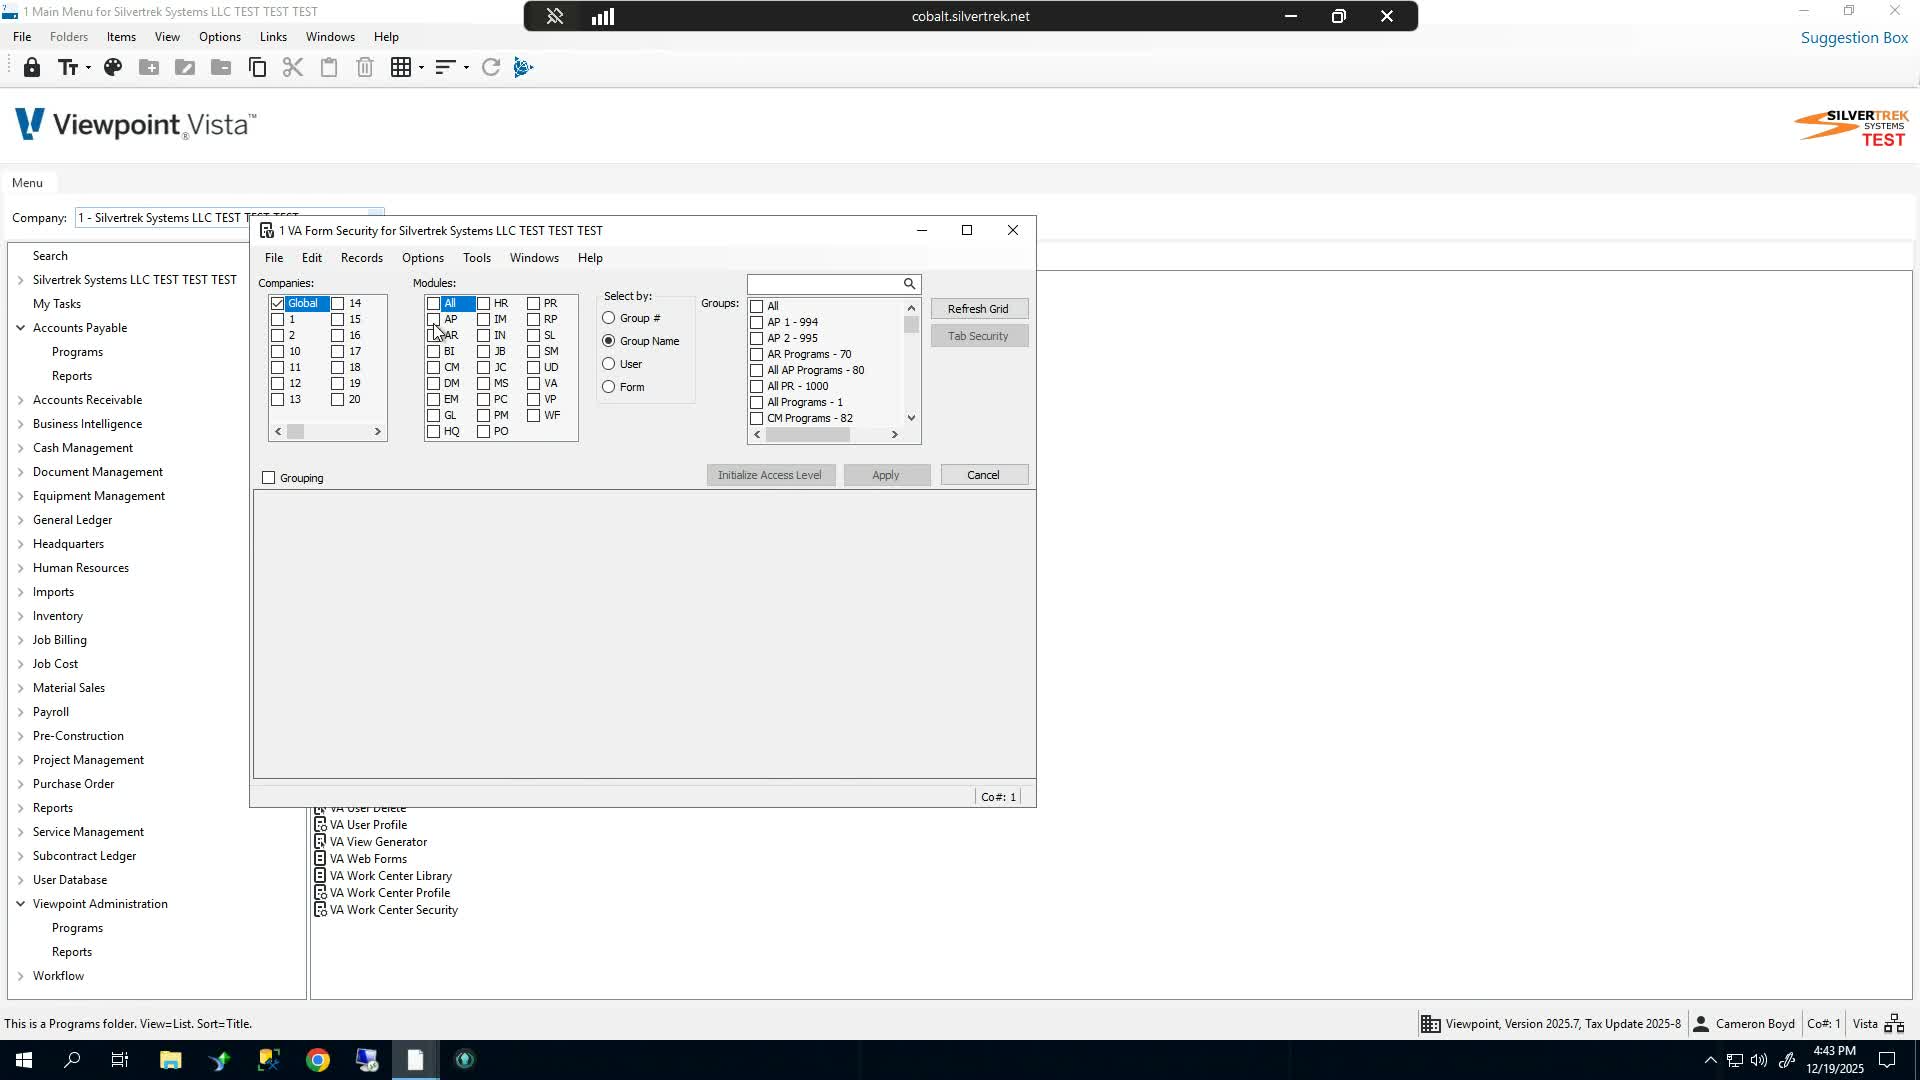
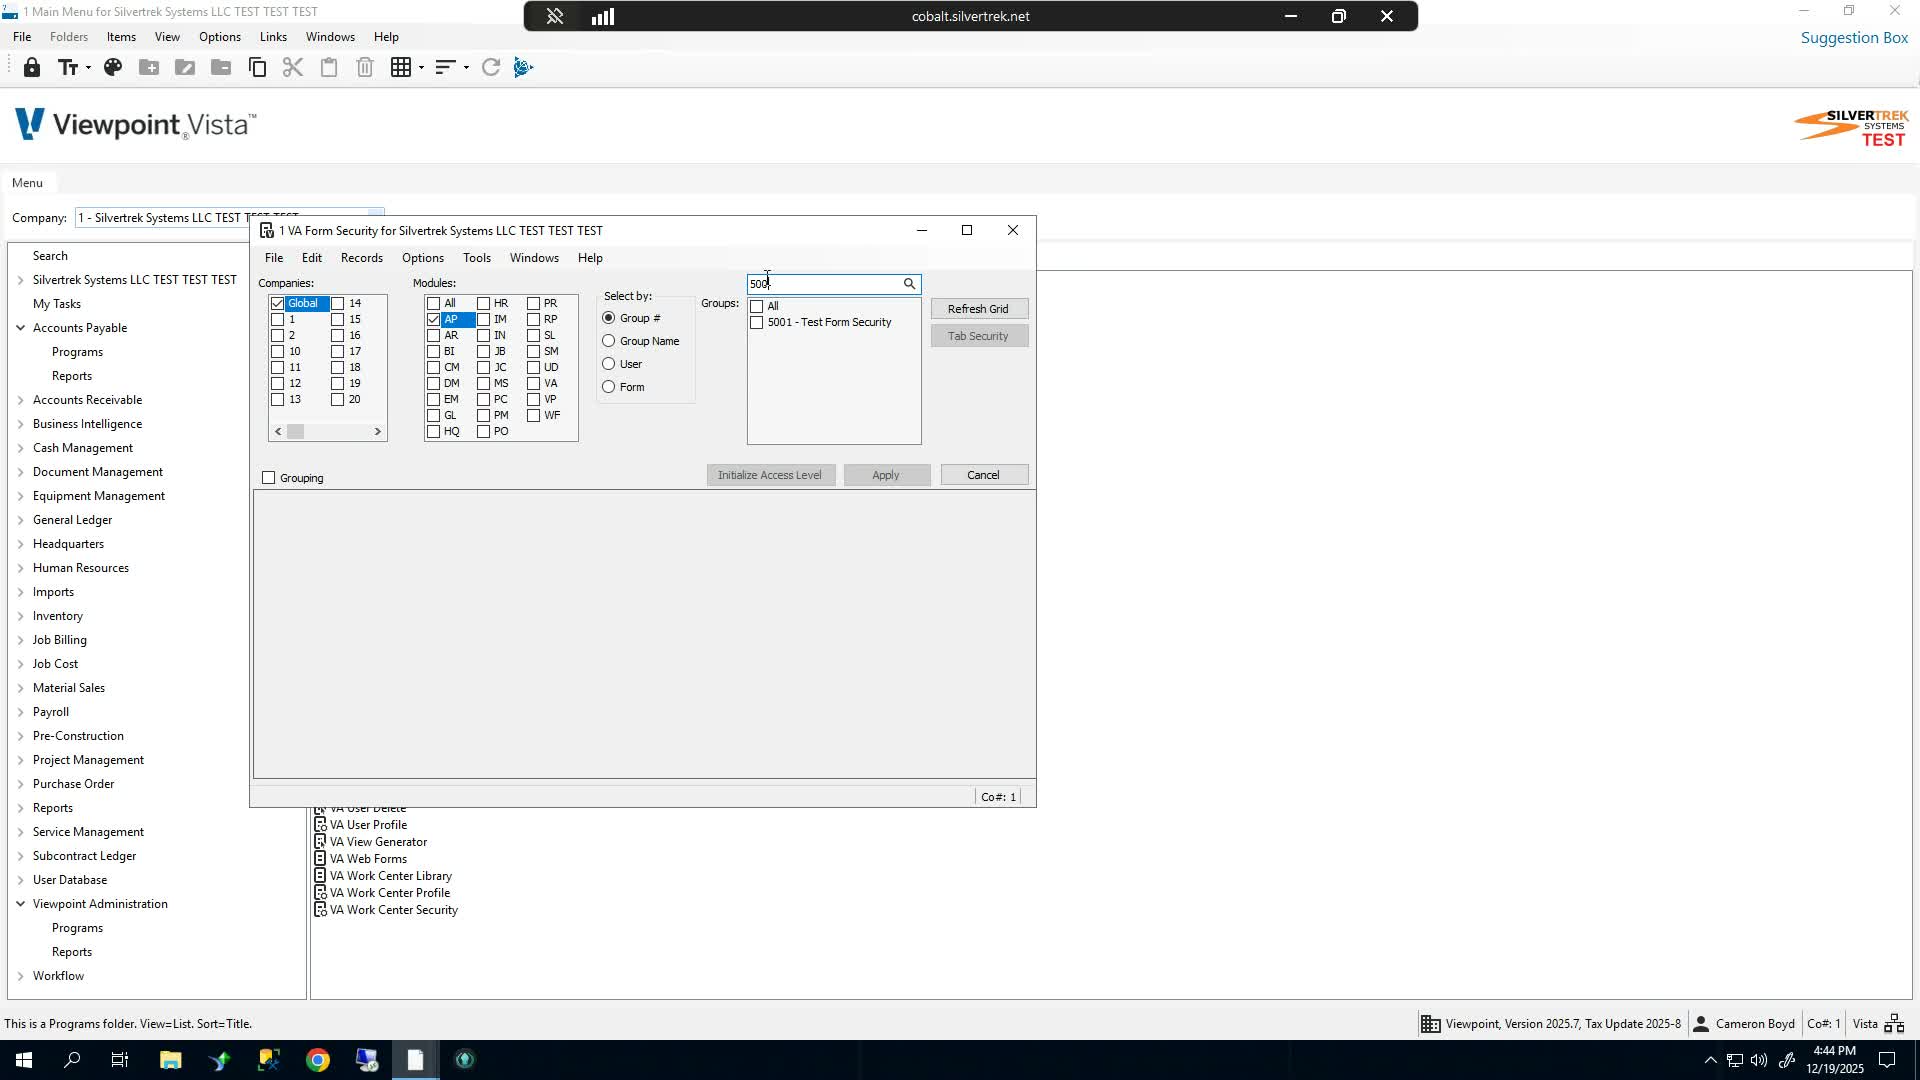
3. Filter the form list by company and module 0:43
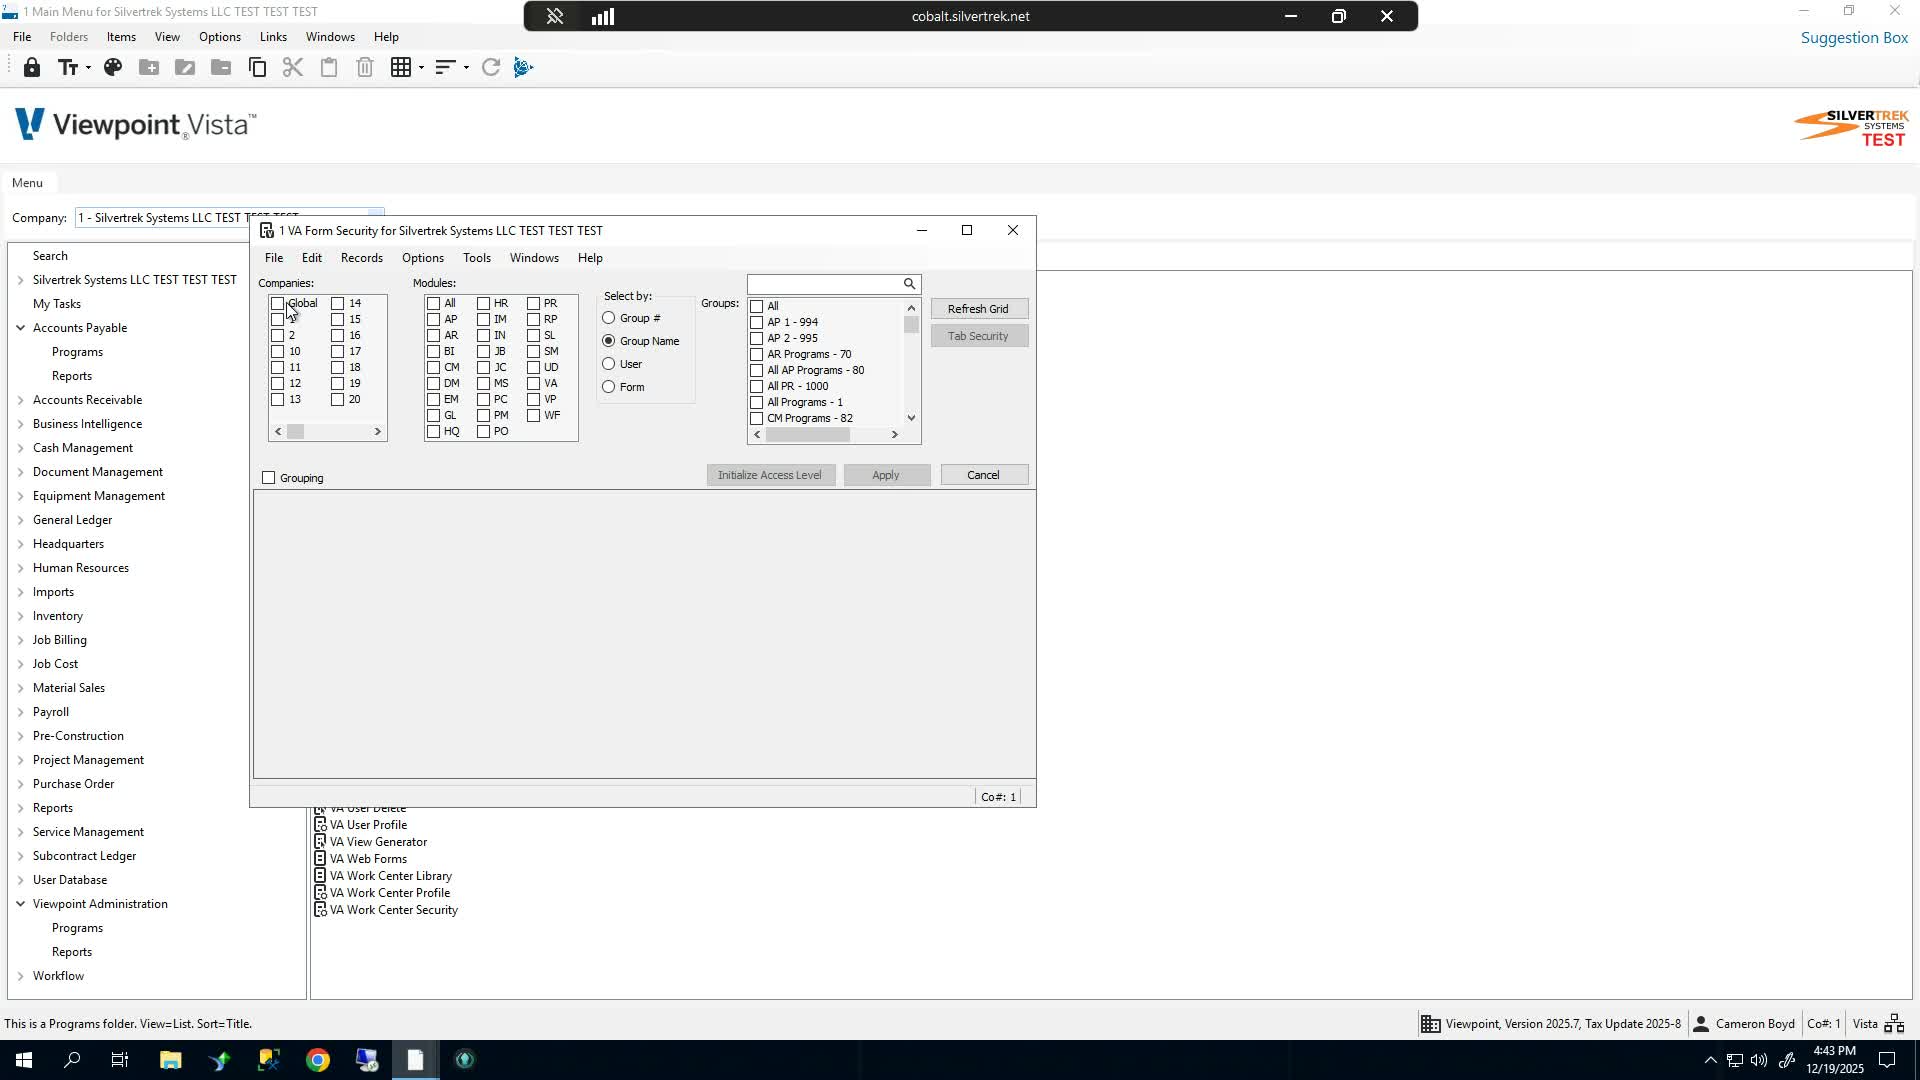
In the Companies field, select the appropriate company scope.
Common option: Global.
You may also choose one or more specific companies if needed.
In the Modules field, select the module to secure.
Example: choose AP for Accounts Payable.
You can also select All if you need to manage every module.
4. Filter by security group and refresh the list 0:56
In the Select By field, choose Group Number.
Enter the target group number.
Click Refresh to load the matching forms for that group.
5. Choose how to view the forms 1:04
Review the forms in the list.
You can either:
Expand the forms by module to review them in grouped sections, or
Enable the grouping option to display everything in a single list.
Use the single-list view if you want to update many forms quickly.
6. Assign the desired access level 1:26
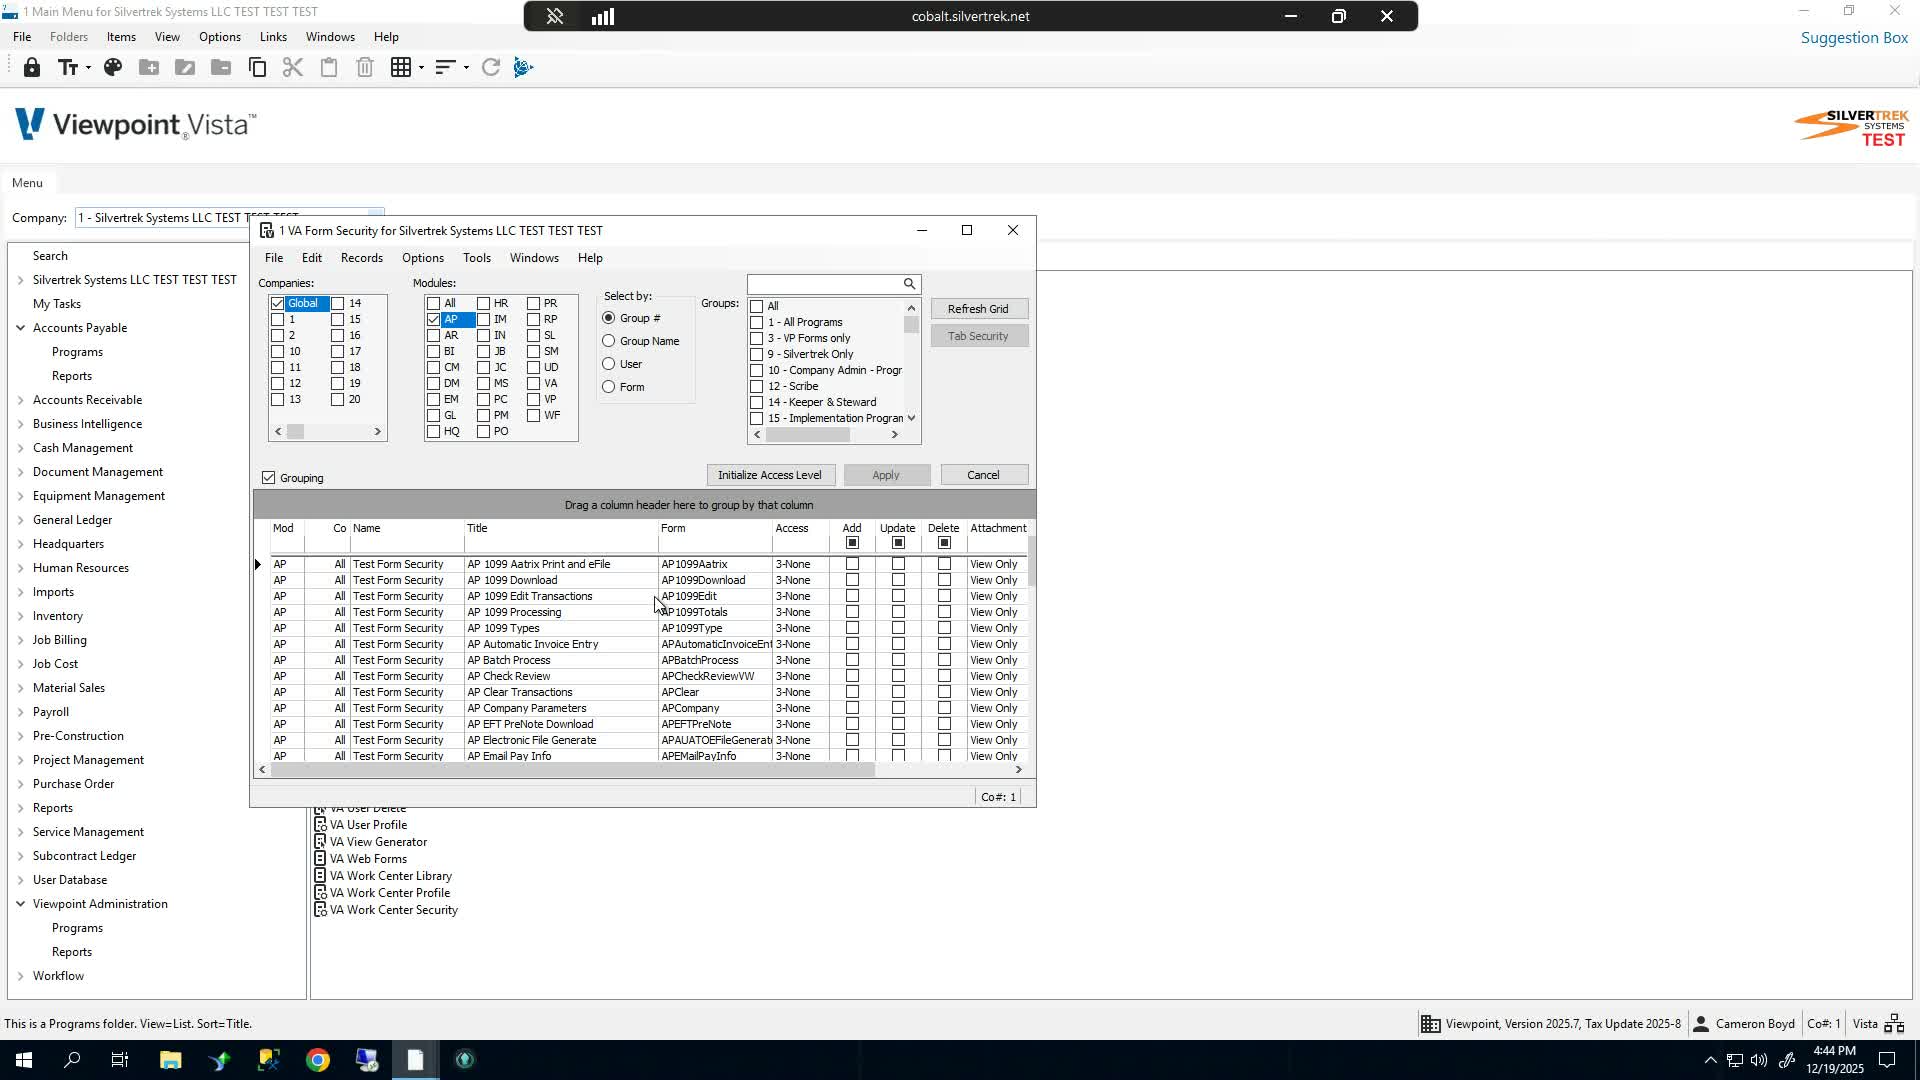
Review the available access options for each form:
Full: grants access to the form.
By Tab: grants access by specific tab within the form.
Denied: overrides other settings and blocks access.
None: leaves the form inaccessible by default.
Select the access level required for the user or group.
If using By Tab, configure the tab-level permissions separately as needed.
7. Apply access changes in bulk 1:39
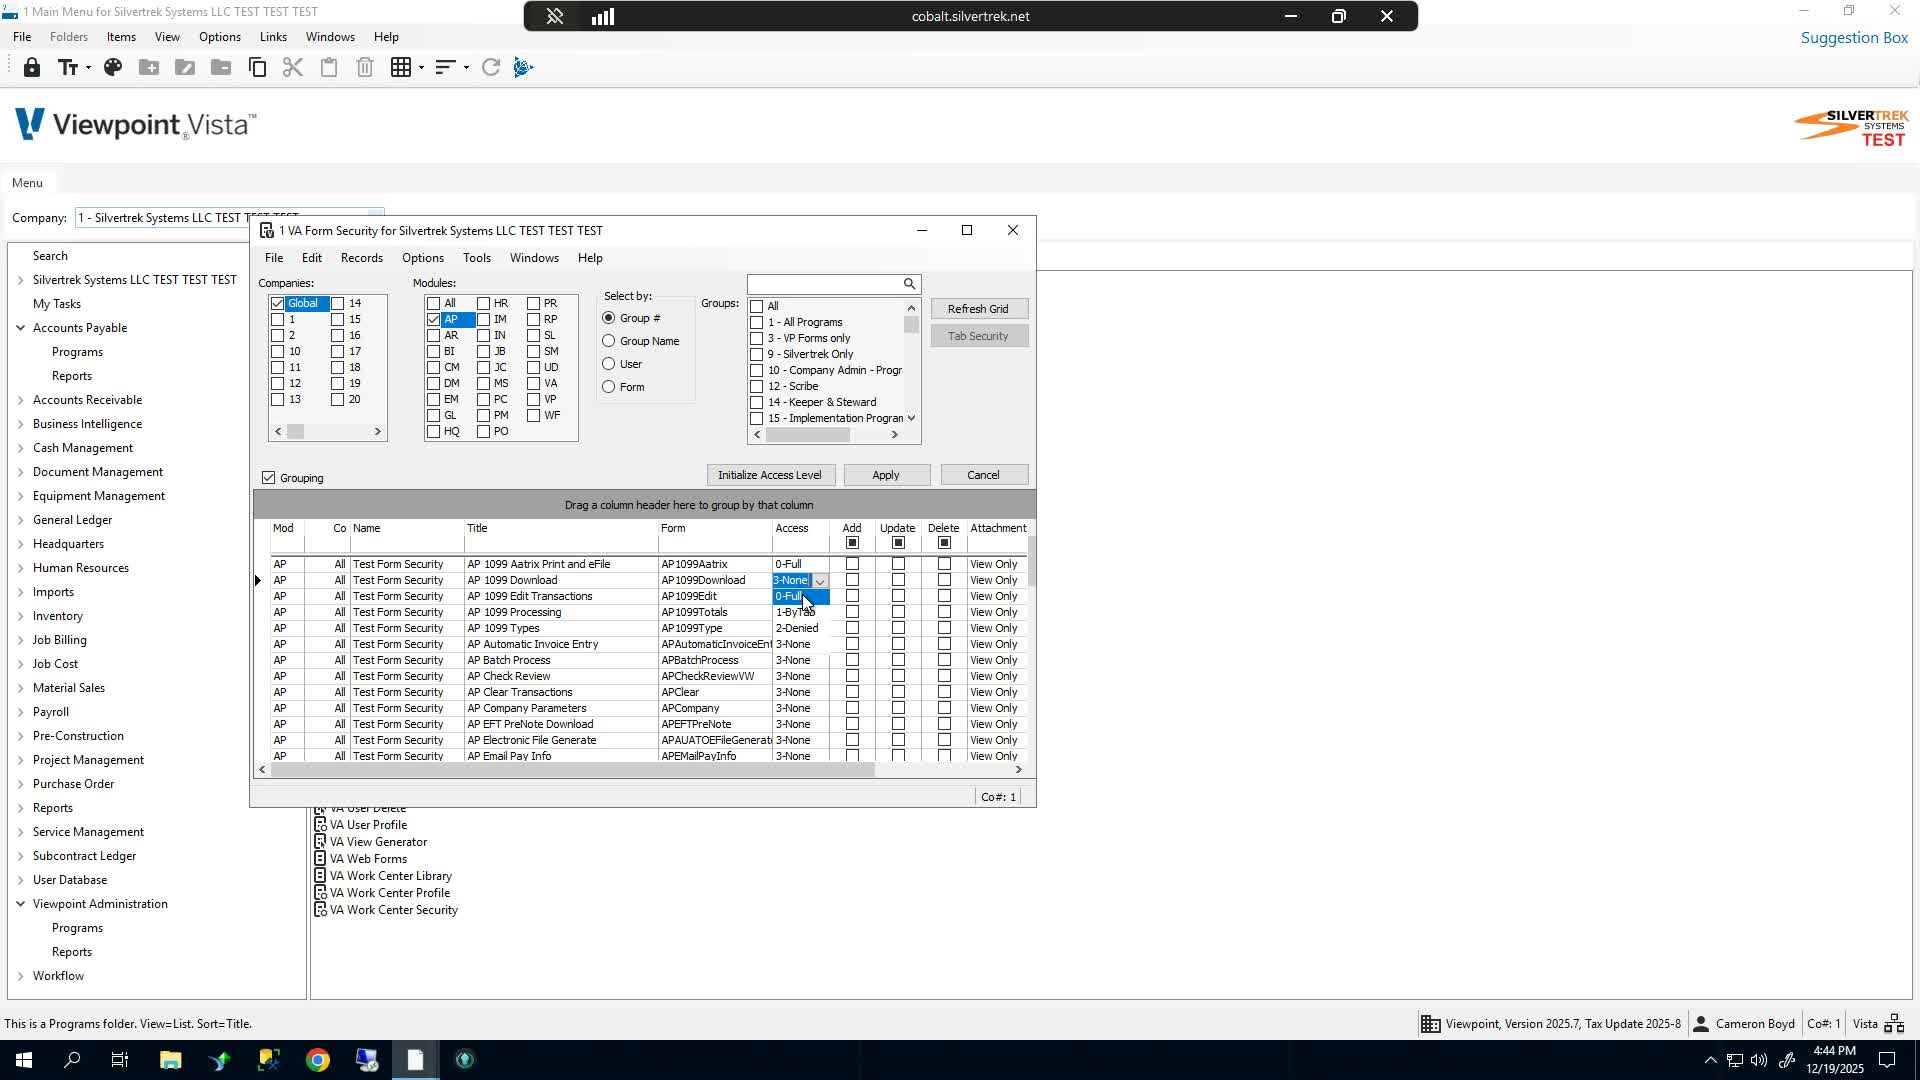
If you need to update many forms at once, use Initialize Access Level.
Choose the access level you want to apply to all listed forms.
Click Add to populate the selected access level across the grid.
Review the grid to confirm the correct access level is set for each form.
8. Save and verify the security update 2:34
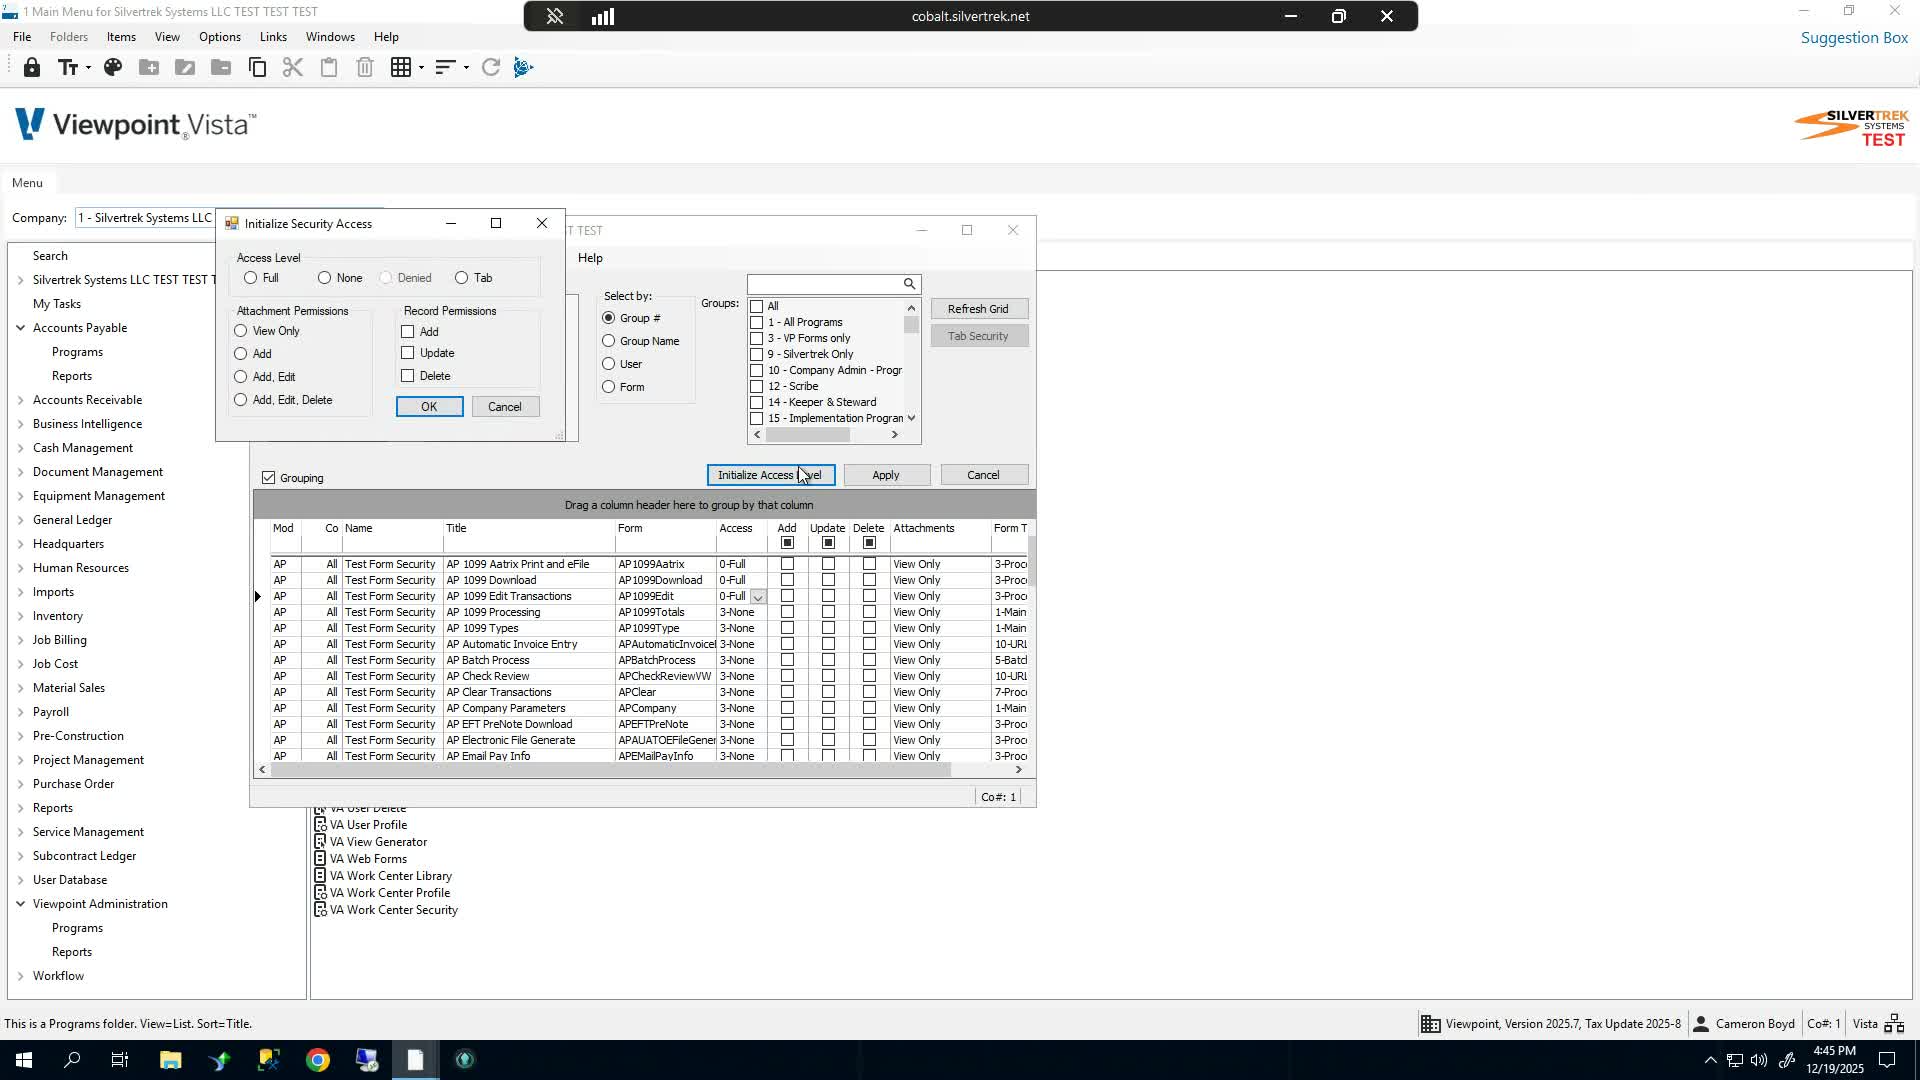
Click Apply to save the security changes.
Close the Form Security screen.
Return to Accounts Payable and verify the forms are now accessible.
Confirm the user/group can open the intended forms without restriction.
Cautionary Notes
Denied takes precedence over all other access settings.
If None is selected, the form remains inaccessible unless another permission is applied.
Be careful when using Initialize Access Level because it can change permissions for all forms in the current grid.
Confirm the correct company and module are selected before applying changes to avoid granting access too broadly.
Tips for Efficiency
Use the grouping option to view all forms in one list when making bulk changes.
Use Initialize Access Level to save time instead of updating each form individually.
Filter by group number and module first to reduce the number of forms displayed.
After applying changes, immediately test access in the target module to confirm the configuration worked.
Link to Loom
Was this article helpful?
That’s Great!
Thank you for your feedback
Sorry! We couldn't be helpful
Thank you for your feedback
Feedback sent
We appreciate your effort and will try to fix the article