When setting up a new vendor, you must specify whether the vendor is subject to required reporting. For example, a vendor doing business in the United States may be subject to 1099 reporting. Therefore, setting the Subject to 1099 Reporting check box in AP Vendors ensures that all transactions posted to that vendor are automatically flagged to be included in the vendor's 1099 totals.
To set a vendor subject to 1099 reporting:
1. On the Add'l Info tab of the AP Vendors form, select the Subject to 1099 reporting check box.
The system enables the 1099 Type, Box#, Proprietor, Include in 1099 Processing, and Mailing Address Seq fields.
2. In the 1099 Type field, enter the 1099 type that the system will use to track payable amounts subject to 1099 reporting for this vendor. Press F4 for a list of 1099 types.
NOTE: Although you can accumulate totals under any 1099 type, if 1099 amounts for this vendor are to be included when printing 1099s or creating 1099 electronic files, you can only use 1099 types of “MISC” (Miscellaneous Income), "NEC" (Non-Employee Compensation, “INT” (Interest Income), or “DIV” (Dividends/Distributions).
3. Once you have selected the type, you can then choose the box number. If using F4 lookup, you will only see box numbers which are applicable to the type you've chosen in the Type field.
4. In the Tax ID# field, specify this vendor’s federal tax identification number, which will print on the 1099 form. You can enter either the vendor's Social Security Number or Employer Identification Number. Then use the drop-down to the right to identify the number you entered here.
5. Enter the proprietor (owner) name, if any, to be included on the 1099 form. You must enter the name as "Last Name, First Name" to enable proper 1099 electronic filing. This name, along with the vendor’s name, is used to aid in Tax ID# reconciliation, and is typically used when an individual is to receive the 1099, but uses a business name for other purposes. The First Name and Last Name fields must also be filled out, when you select the SSN option.
6. Select the Include in 1099 Processing (ignore minimum) check box if the system should include a vendor's totals when processing (downloading or printing) 1099s, regardless of whether the vendor's payment is less than the specified minimum payment amount.
NOTE: If you do not select this check box, the system only prints a 1099 for the vendor if the vendor's payment is equal to or greater than the value in the Minimum Payment Amount field in the AP 1099 Download form.
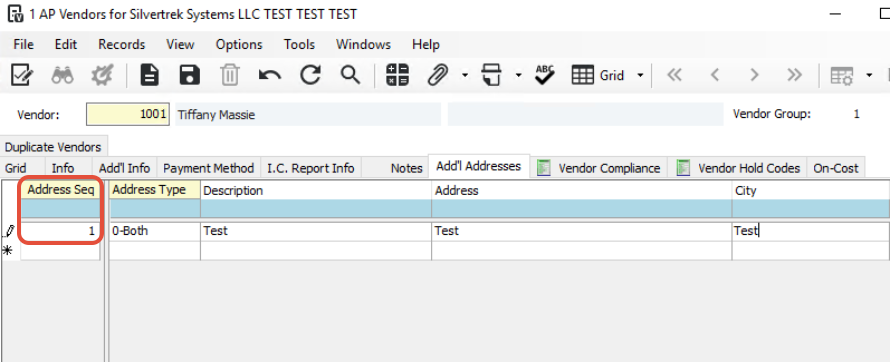
7. If you need to send the 1099 to an address other than the payment address specified for the vendor on the Info tab, enter a mailing address sequence in the Mailing Address Seq field or press F4 to see a list of sequences. These sequences are maintained on the Add'l Addresses tab of the AP Vendors form. If you enter a sequence in this field, the system will use the associated address when printing 1099s or generating 1099 electronic files.
You have now completed the setup required for 1099 reporting. All invoices created for this vendor will now be marked for 1099 reporting based on the selections you've made in this form.
NOTE: If you make changes to these settings at a later date, the changes will not be applied to existing invoices retroactively. Changes to the 1099 settings will only apply to new invoices that are created after the change. If you have existing invoices that need to be updated to the new settings, this must be done manually within the AP Transaction Entry, AP Unapproved Invoice Entry, or AP 1099 Processing forms.
Was this article helpful?
That’s Great!
Thank you for your feedback
Sorry! We couldn't be helpful
Thank you for your feedback
Feedback sent
We appreciate your effort and will try to fix the article