Leave codes can be set to accrue a fixed amount over a set period, like yearly, monthly, or weekly (e.g., 80 hours of vacation per year).
Steps to set up in PR Leave Codes:
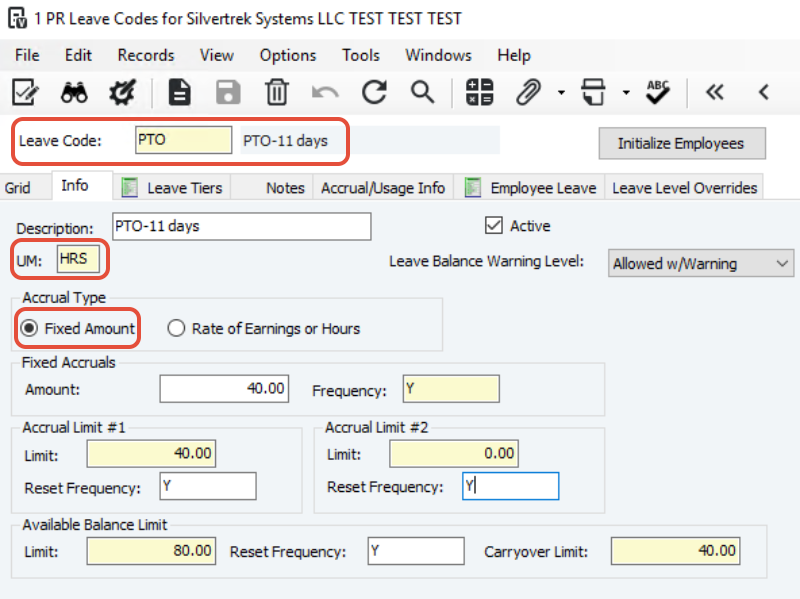
Go to the Info tab.
Fill in the fields:
Leave Code: Enter an ID (e.g., VAC or PTO).
Description: Describe the leave code.
UM (Unit of Measure): Usually hours (HRS).
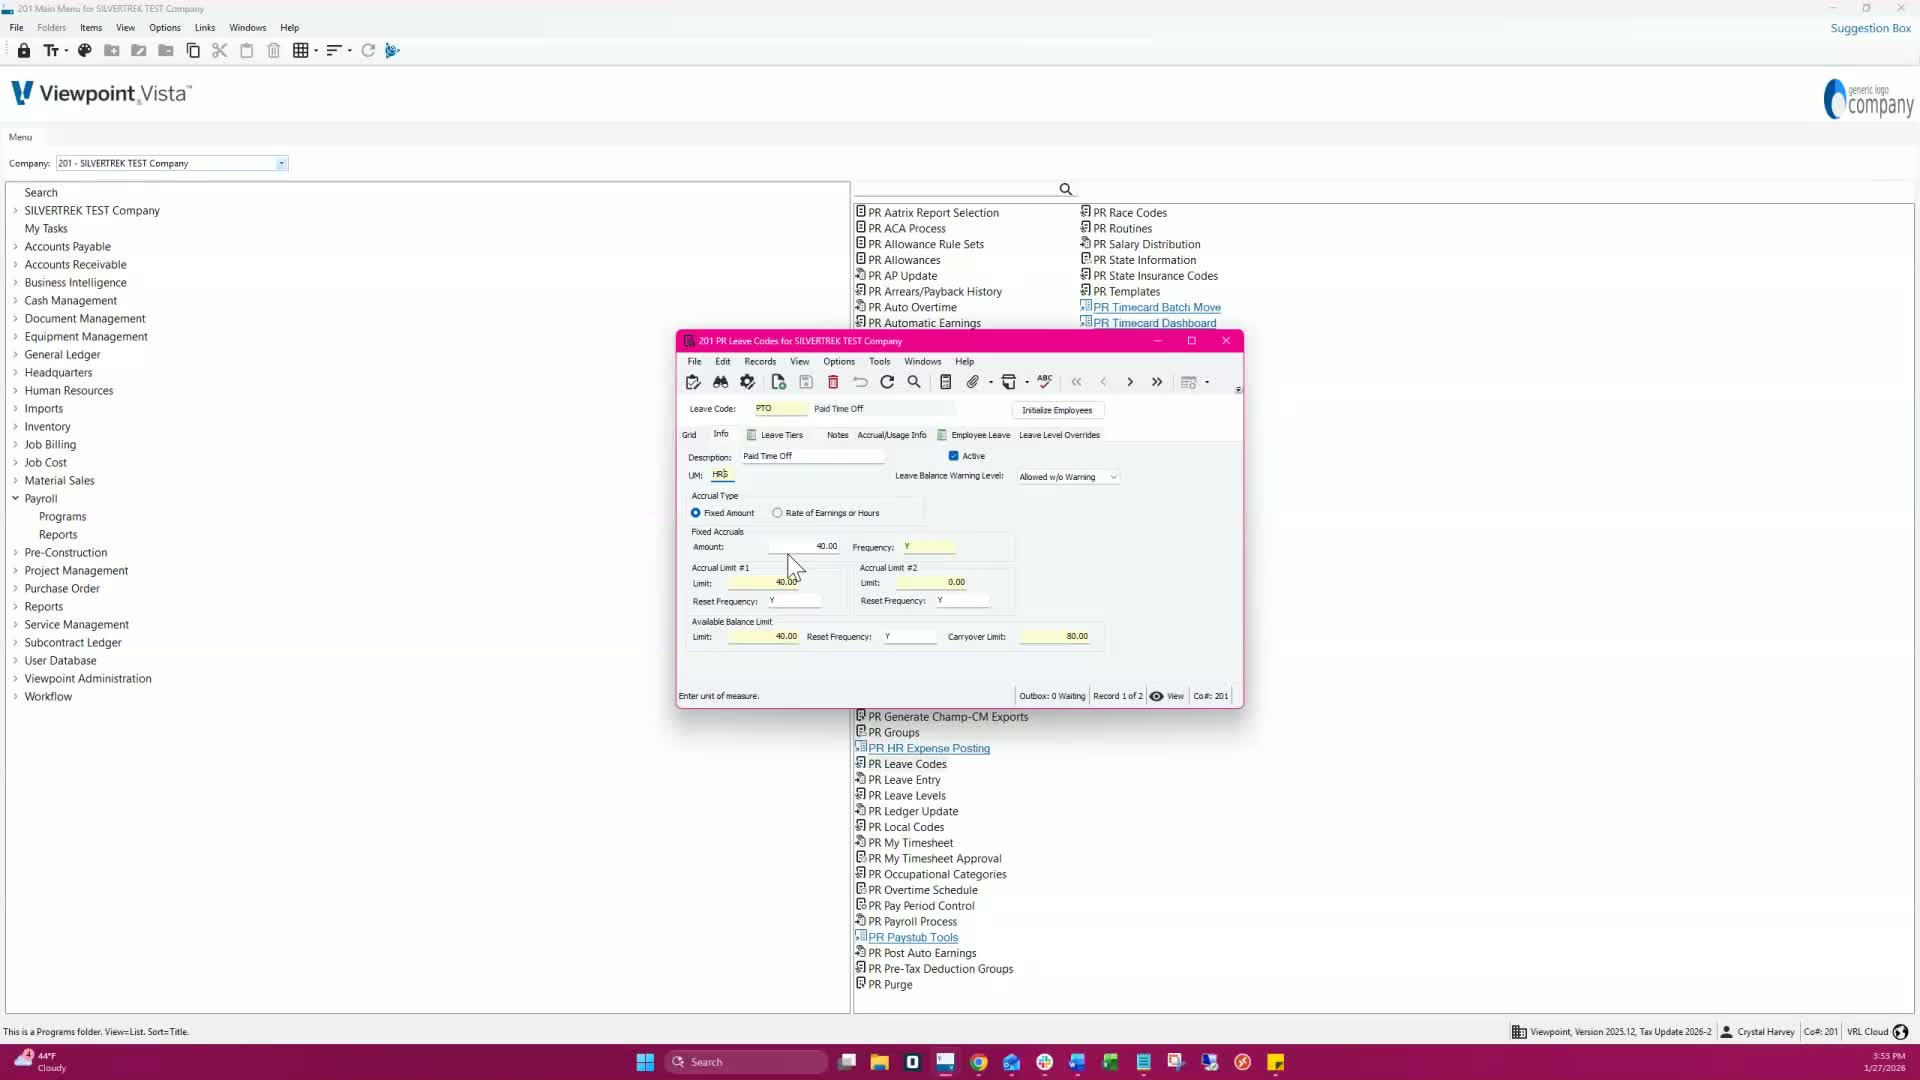
Accrual Type: Select Fixed Amount.
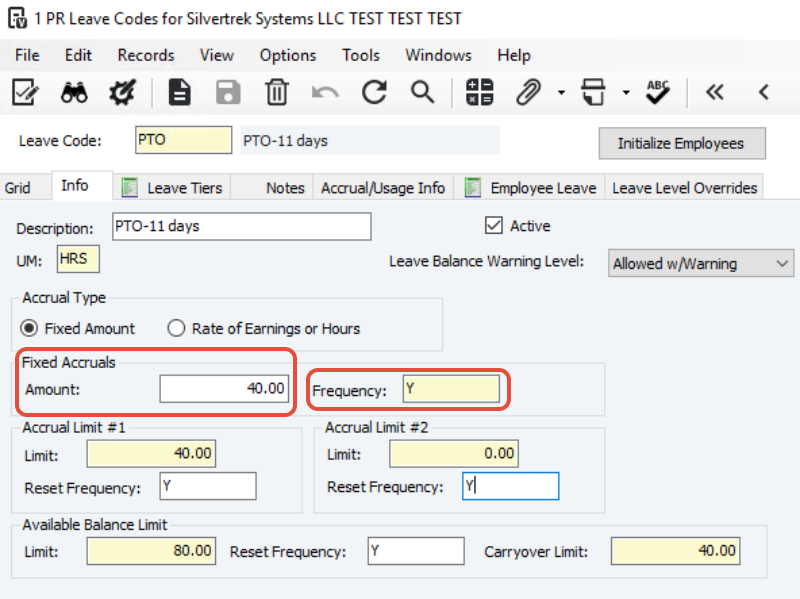
 Fixed Accruals
Amount: Number of hours or units to accrue for this leave code. Can be changed per employee if needed.
Weekly Example: 0.77 hours/week → 40 hours/year (0.77 × 52)
Monthly Example: 3.33 hours/month → 40 hours/year (3.33 × 12)
Yearly Example: 40 hours/year
Frequency: How often the leave accrues. Press F4 to see valid options.
Accrual Limits #1 and #2
Optional, but helpful to prevent accidentally adding extra leave if payroll accrual runs more than once in the same period.
You can set limits for two different time frames (e.g., monthly and yearly).
For each limit, enter the maximum units that can be accrued and the Reset Frequency.
Tip: Don’t set limits until after entering beginning balances.
Example (Yearly):
Limit: 40
Reset Frequency: Y (yearly)
This prevents more than 40 hours from being accrued in a year.
 Available Balance Limit
Limit: Maximum units (or hours) allowed at one time. Use
999999.00if unlimited.Reset Frequency: How often the balance resets. Leave blank if no reset.
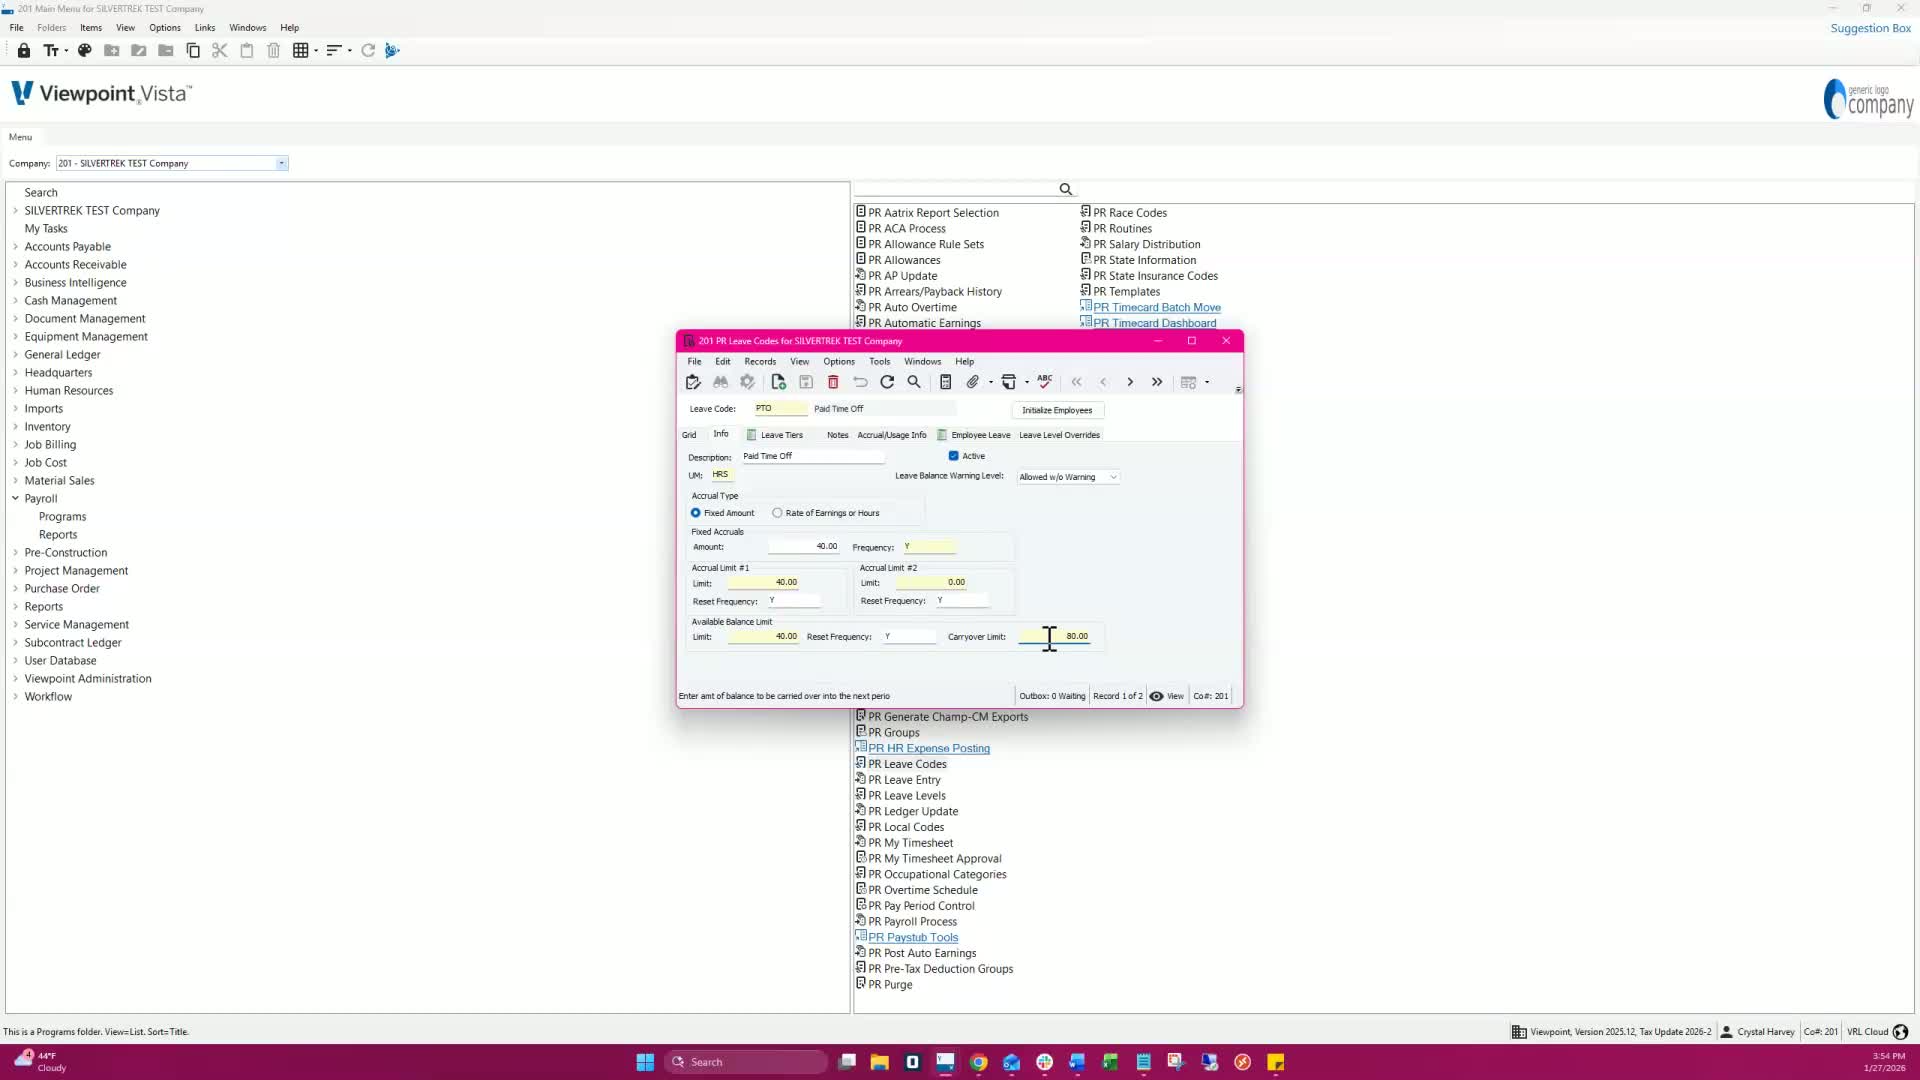
Carryover Limit: Maximum units (or hours) carried over after a reset. Use
0.00if none.
Example (fixed weekly accrual):
Leave accrues 0.77 hours per week.
Weekly limit: 0.77 hours.
Annual limit: 40 hours.
Maximum balance at any time: 80 hours, resets yearly.
Carryover after reset: 40 hours.
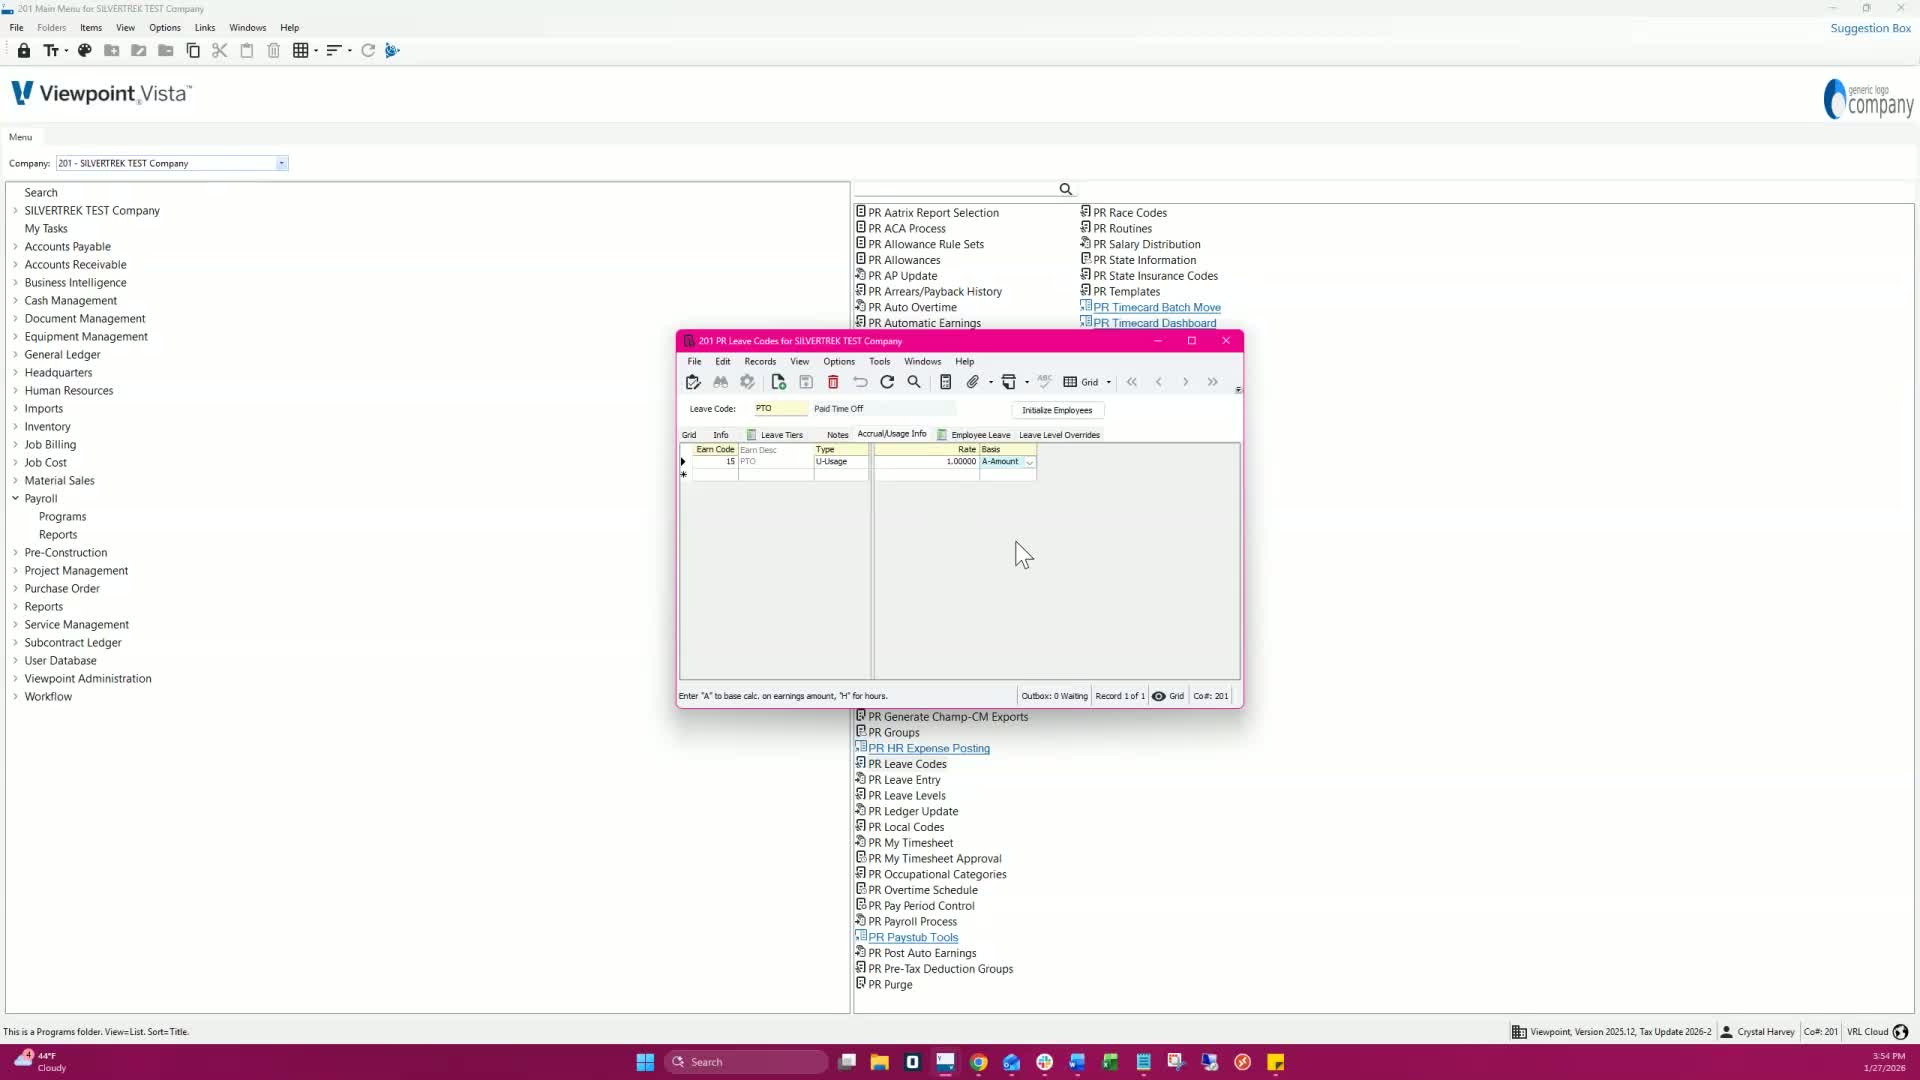
PR Leave Codes Form (Accrual/Usage Info tab)
Earn Code: Code(s) tracking leave usage in PR Timecard Entry.
Earn Desc: Defaults from Earn Code.
Type: Use U-Usage for fixed accrual.
Basis: H-Hours (usage calculated in hours).
Rate:
1.00→ 1 hour used = 1 hour deducted from leave code.
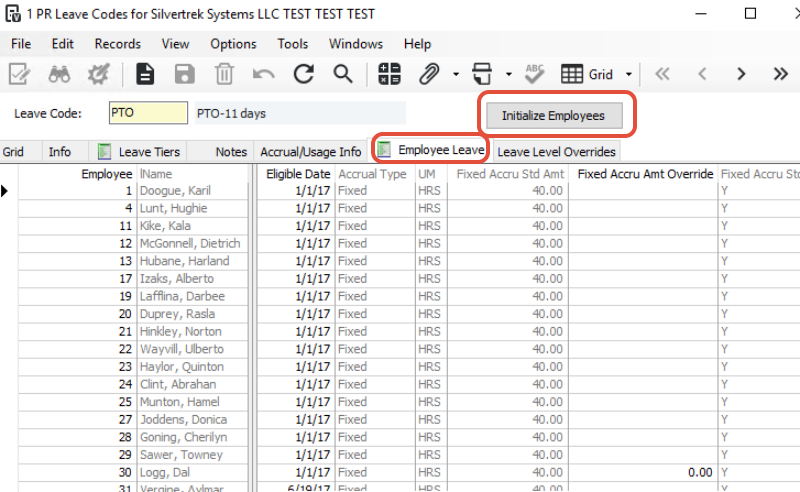
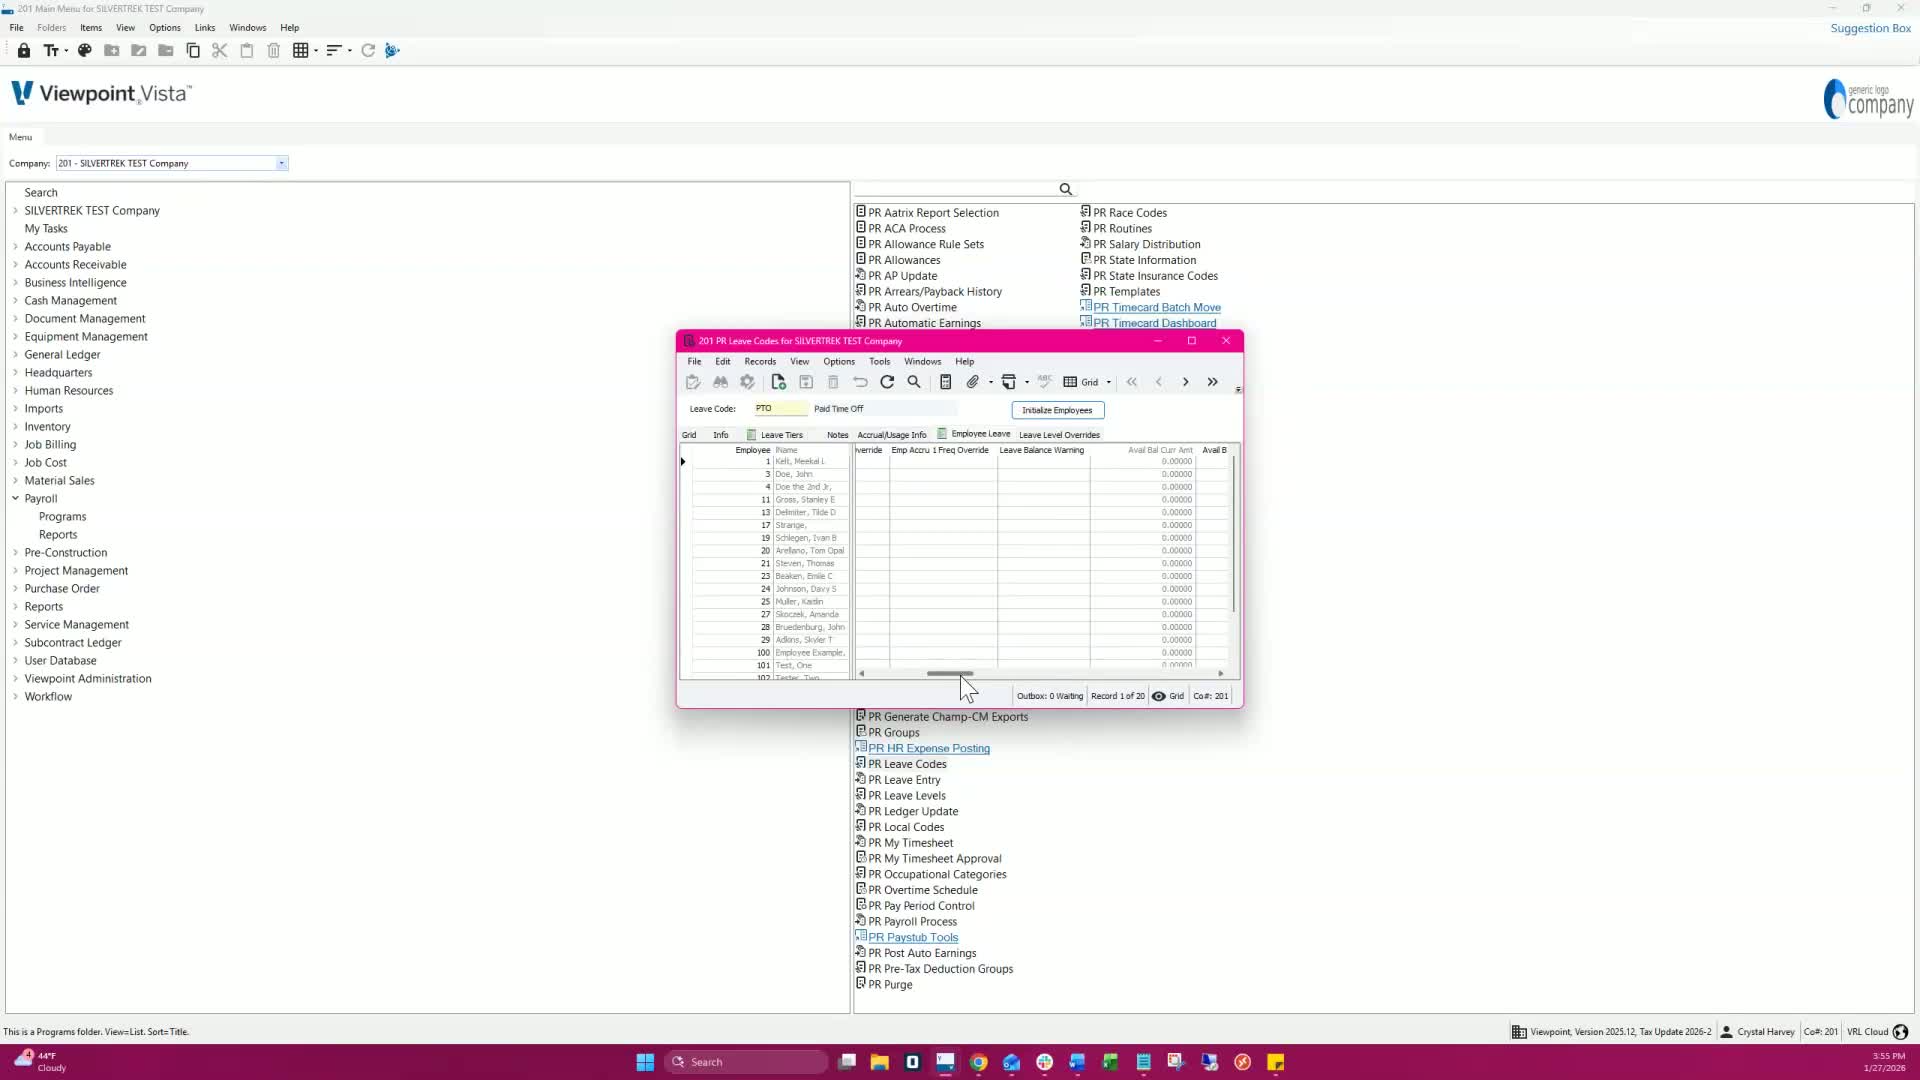
Employee Leave Tab
Add employees who will use this leave code.
Options:
Enter employees one by one manually.
Or click Initialize Employees to add groups by payroll group
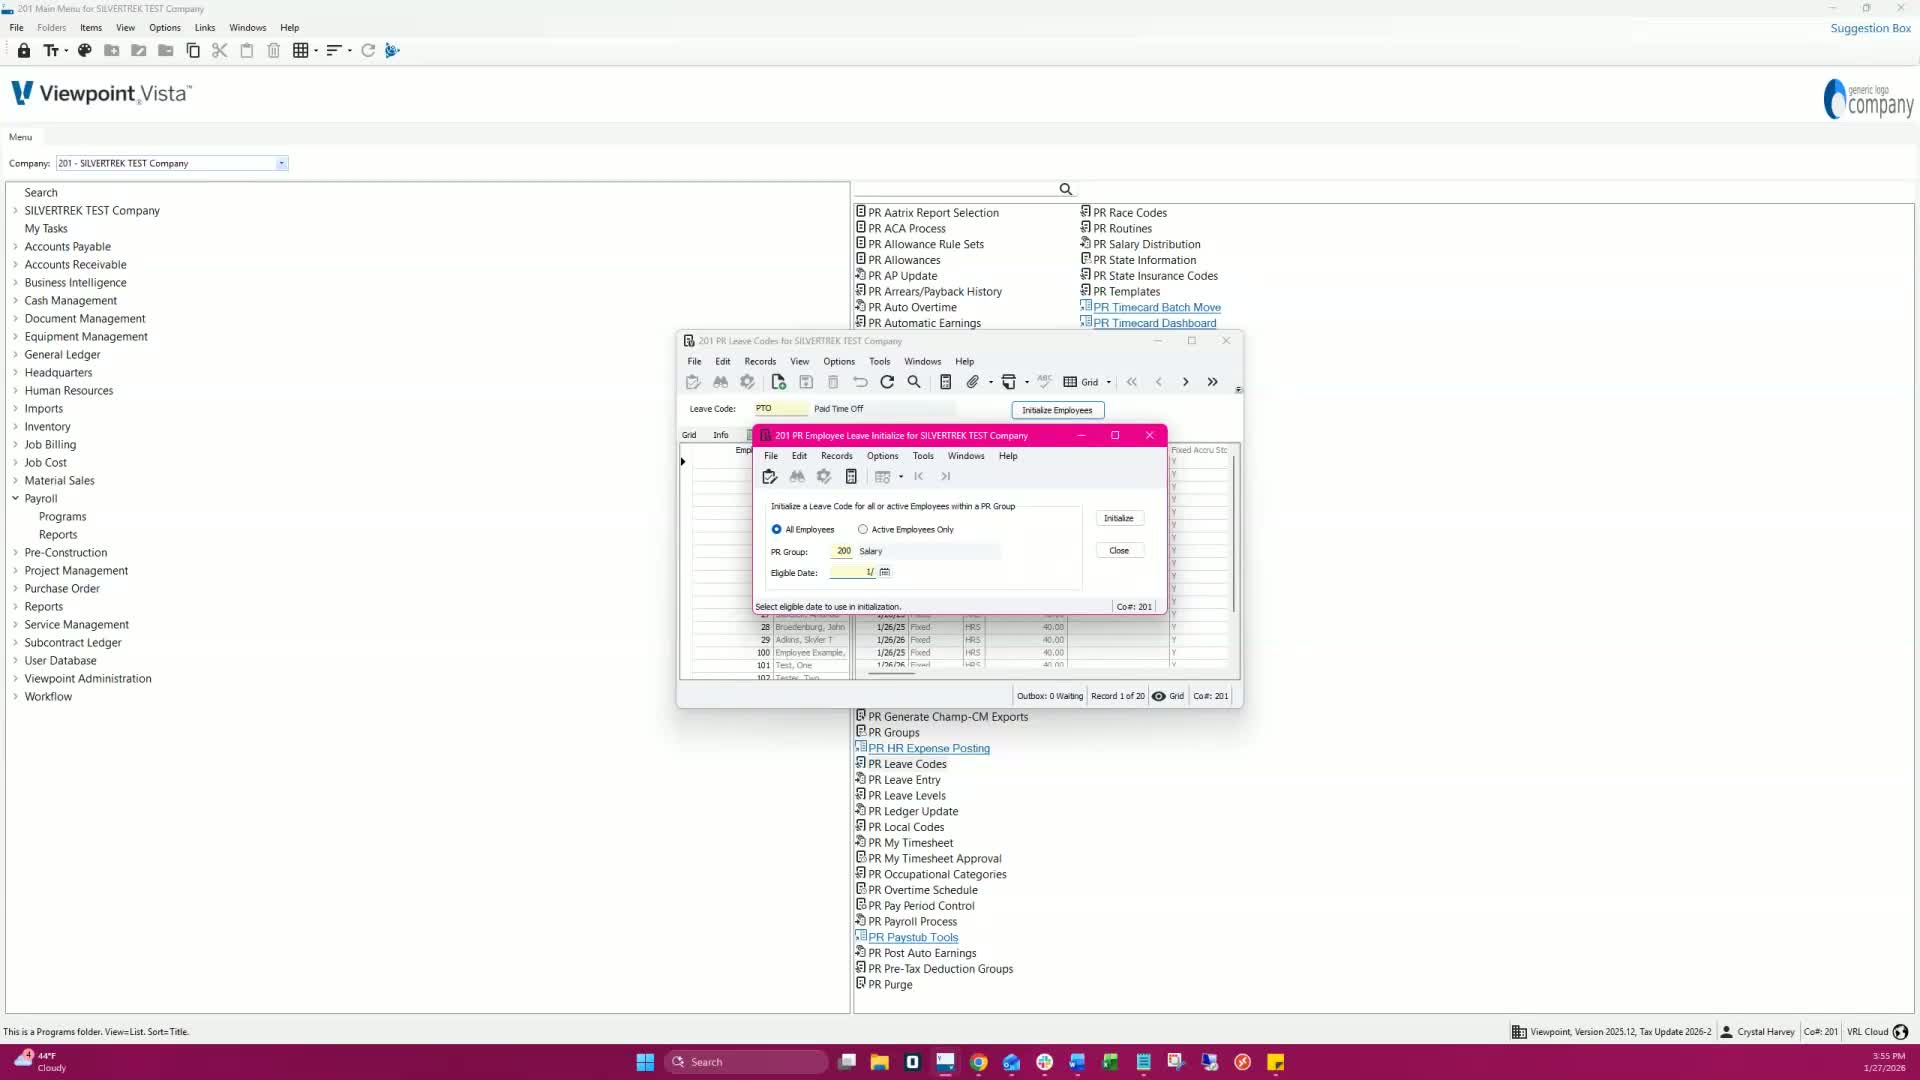
PR Employee Leave Overrides
You can override leave code defaults for:
Fixed Accrual Amount
Frequency Accrual Limit #1 & #2
Frequency
Available Balance Limit
Carryover Limit
Initialize Employees:
Choose All Employees or Active Only.
Enter PR Group and Eligible Date.
New entries start with no overrides and 0.00 balance.
Existing employee leave codes are not changed.

Eligible Date
The date an employee becomes eligible for the leave code.
No accrual or usage happens before this date.

Last Date Reset
Defaults to the employee’s Eligible Date.
Updated automatically when PR Leave Code Reset is done.
No accrual or usage can occur on this date.
Setting Up a Fixed Accrual Leave Code in VISTA
Objective
This SOP outlines the steps to create a fixed accrual leave code in VISTA for managing PTO, vacation, or sick leave hours.
Key Steps
1. Open PR Leave Codes 0:20
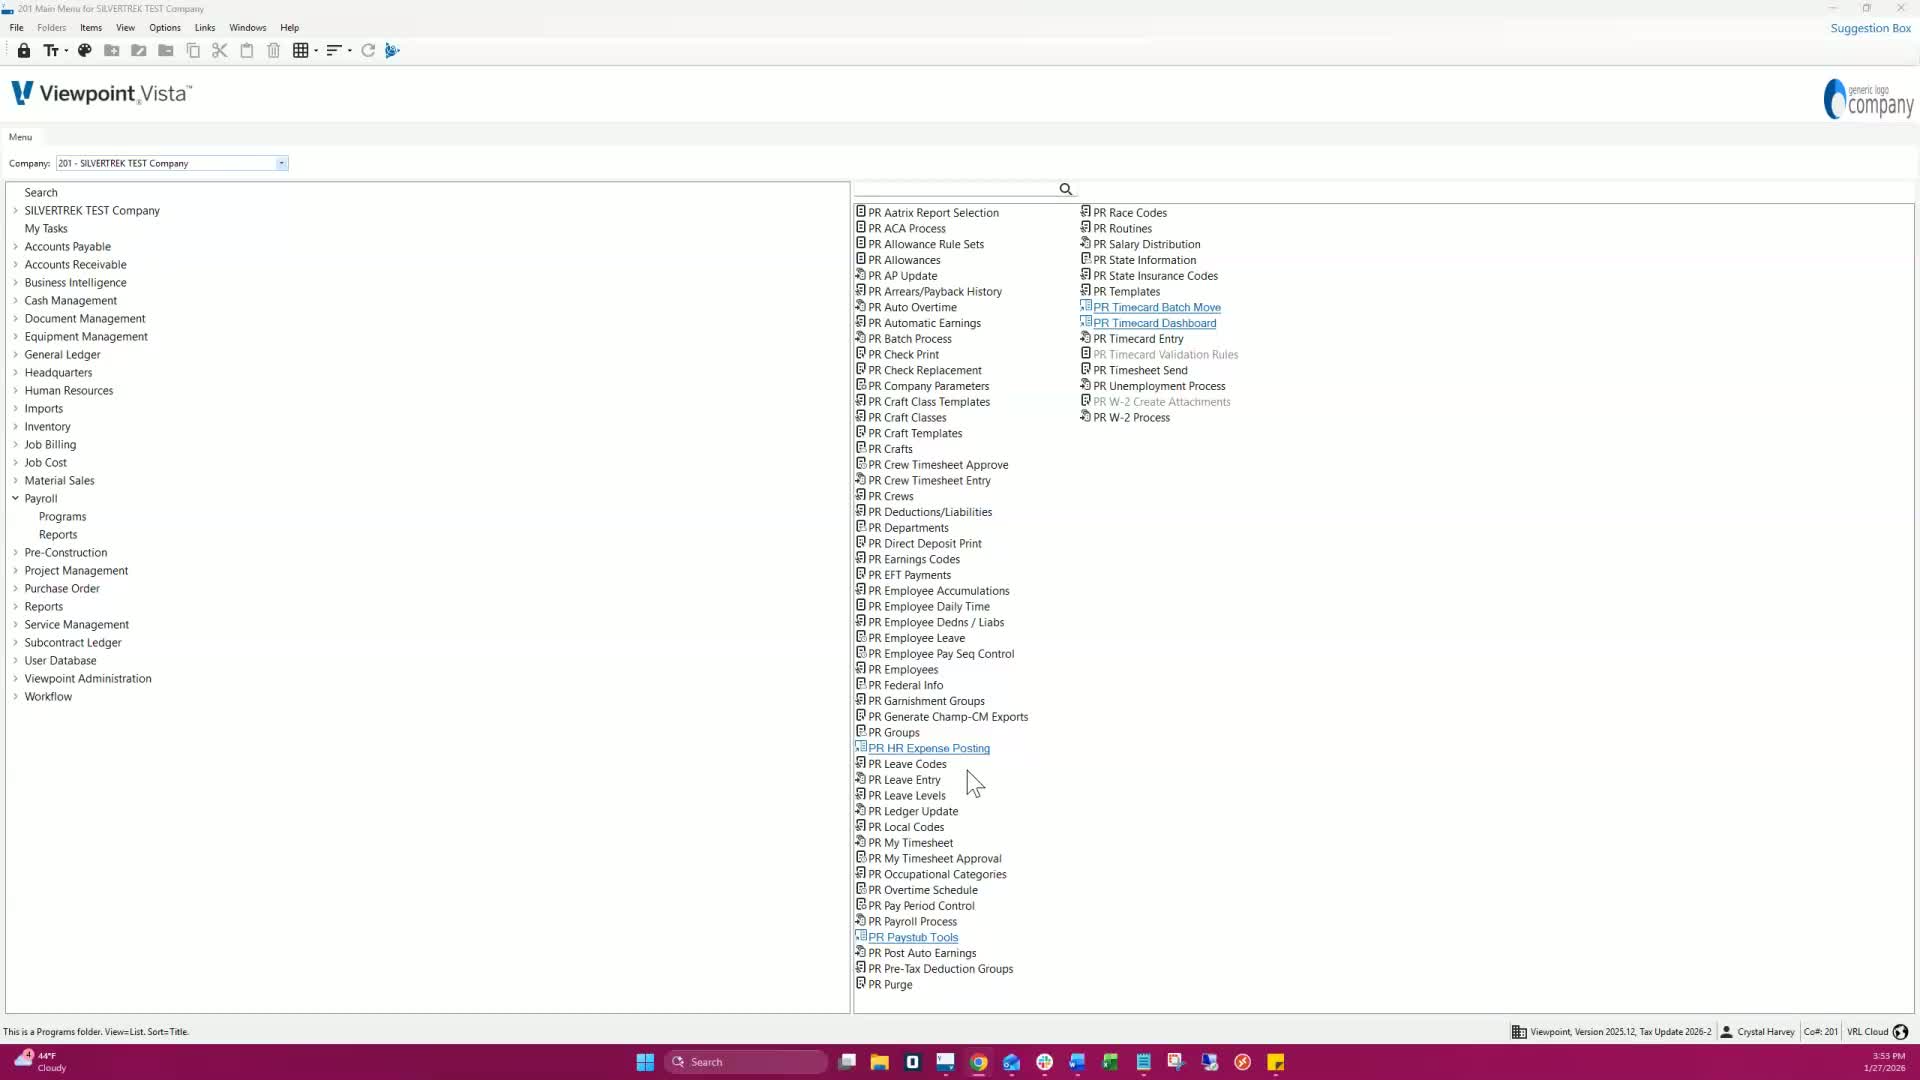
Navigate to the PR Leave Codes section in VISTA.
On the Info tab, enter the following:
Leave Code ID
Description.
2. Configure Leave Code Settings 0:31

Assign the unit of measurement as hours.
Select the accrual type as fixed amount accrual.
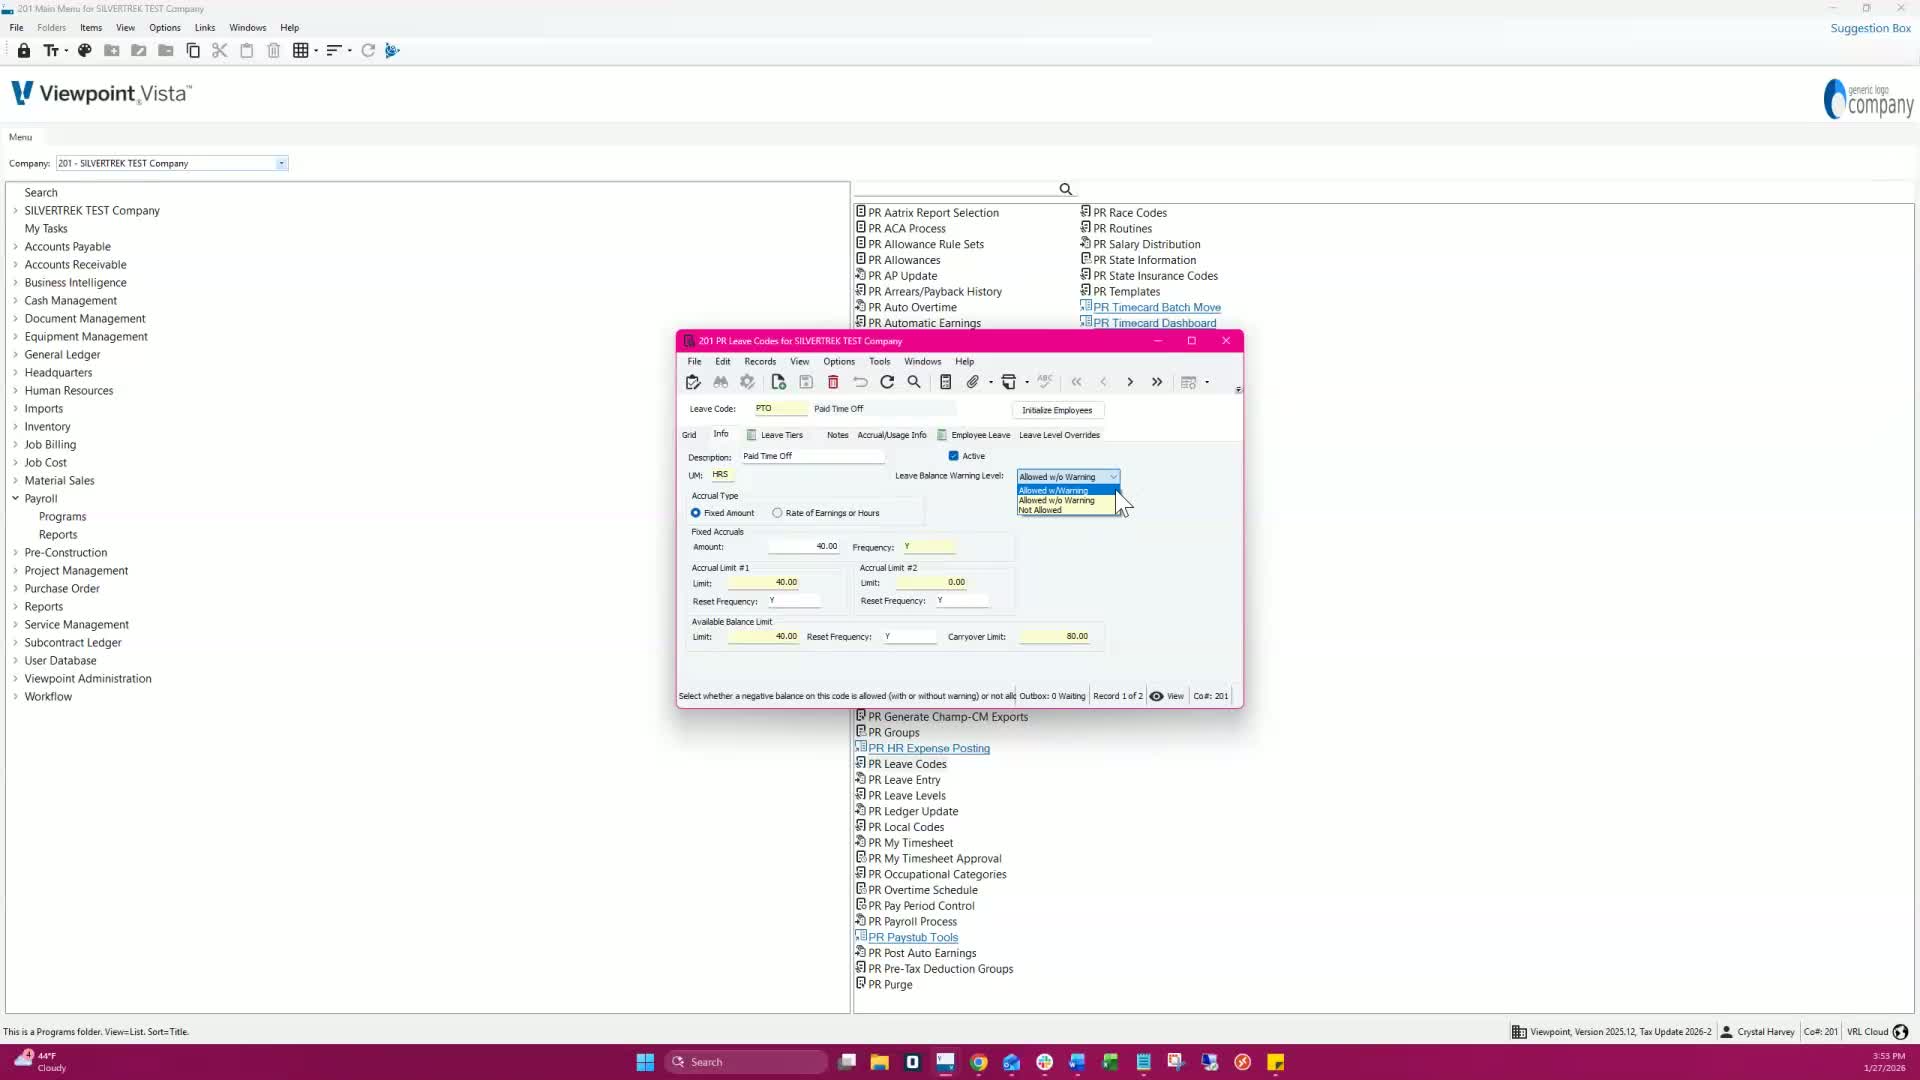
3. Set Leave Balance Warning Level 0:42
Choose a leave balance warning level:
Allowed with warning
Allowed without warning
Not allowed at all.
4. Enter Fixed Accrual Details 0:52
In the Fixed Accruals section, enter:
Yearly accrual hours amount.
Frequency (commonly Y for yearly).
Optionally set:
Accrual limits
Available balance limits
Carryover limits.
5. Save the Leave Code 1:04

Click Save to store the leave code.
6. Add Usage Earnings Code 1:15
Go to the Accrual Usage Info tab.
Add an earnings code with the following settings:
Type: Usage
Rate: 1
Basis: Amount.
Click Save.
7. Initialize Employees for Leave Code 1:41
Open the Employee Leave tab.
Click Initialize Employees.
Select Active Only and enter a PIN.
Enter the eligible date (before any activity is posted).
Click Initialize and then Close.
8. Adjust Employee Records 2:04
Delete any unwanted employees or adjust records in the grid as needed.
Apply employee overrides in the employee grid if necessary.
9. Save Employee Changes 2:30

Click Save to confirm any changes made to employee records.
10. Post Beginning Balances 2:30
At this point, you can post the beginning balances for your employees.
Cautionary Notes
Ensure that the eligible date is set correctly to avoid posting errors.
Double-check the leave balance warning level to prevent negative balances if not intended.
Tips for Efficiency
Use templates for common leave codes to speed up the process.
Regularly review and update leave codes to reflect any policy changes.
Link to Loom
Was this article helpful?
That’s Great!
Thank you for your feedback
Sorry! We couldn't be helpful
Thank you for your feedback
Feedback sent
We appreciate your effort and will try to fix the article