This guide outlines the step-by-step process for completing Year-End W-2s in Vista using Aatrix.
1. Initial Setup
Navigate to Payroll Module > Programs > PR W2 Process.
Enter the Year for which you are processing W-2s.
Enter a Contact Email Address (used by the IRS if needed).
If you have Third Party Sick Pay, check the Third Party Sick Pay Indicator box.
Under Options to Initialize Retirement Plan, check the box if applicable.
Click Save.
This enables the Initialize Header button, which imports your company information.

2. Additional Information (Maryland Only)
The Add’l Info tab is used only for Maryland users.
Refer to F1 Help for detailed field descriptions.

3. Federal Information
3a. Enter Federal Reporting Items
Open the Federal Information tab.
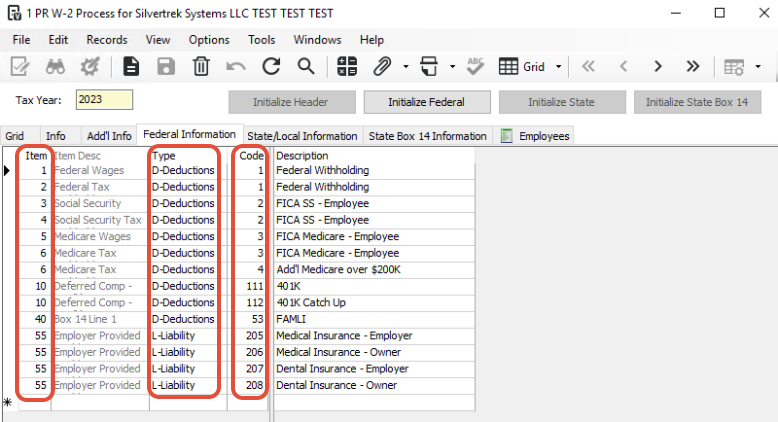
Enter all IRS Items required for reporting.
Use F1 Look Up on the Item field to select appropriate values.
If this is your first year filing W-2s in Vista, fields will be blank.
If you filed last year, previously entered items will appear.
Add any miscellaneous Box 14 items under Federal 2 in Misc Box 14, as needed.
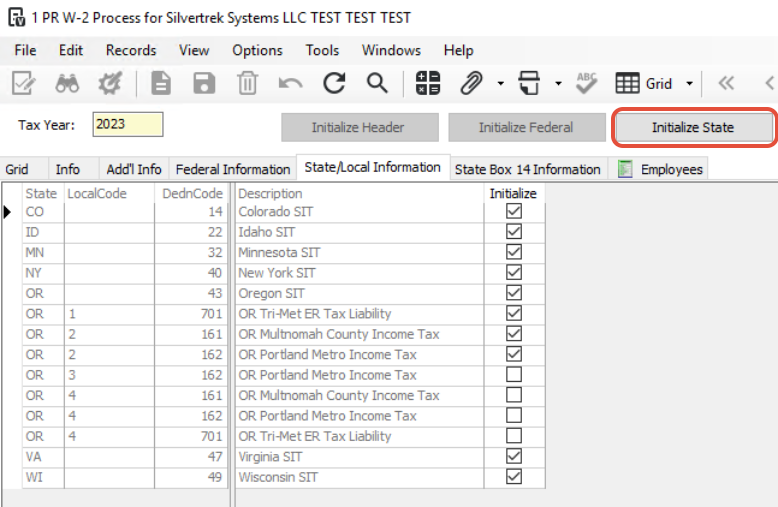
4. State and Local Information
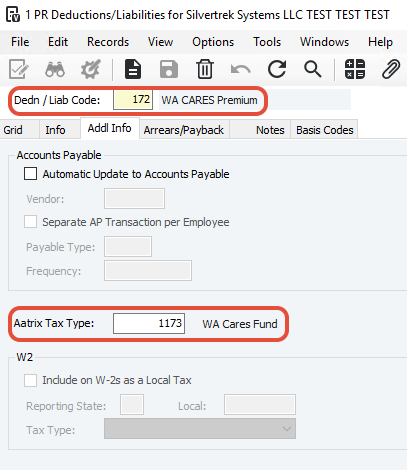
Navigate to PR Deductions and Liabilities.
For each State and Local Code:
Open the record.
Go to the Additional Info tab.
Add the Aatrix Tax Type.
If unsure, press F4 to access the lookup table.
Assign an Aatrix Tax Type to every State and Local tax you expect to see in Aatrix.
Tip:
State and Local Codes are pulled from PR State Information and PR Local Code Setup.
If this is your first year processing W-2s in Vista, click Initialize State.
This will import each State and Local Code.
If you’ve processed W-2s before, codes will populate automatically.
Review and adjust checkboxes to indicate which State/Local Codes apply.
Once complete, click Initialize State to import State/Local information.
5. State Box 14 Information
Add any applicable State Box 14 Items here (items specific to state reporting).
Federal Box 14 items should be added under the Federal Information tab.
Once complete, click Initialize State Box 14.

6. Employee Information
6a. Review Employee List
Once all tabs are initialized, you’ll see a list of employees.
Data shown here can be reviewed but does not update Aatrix, as Aatrix uses accumulation data.
To edit an employee, double-click the employee line.

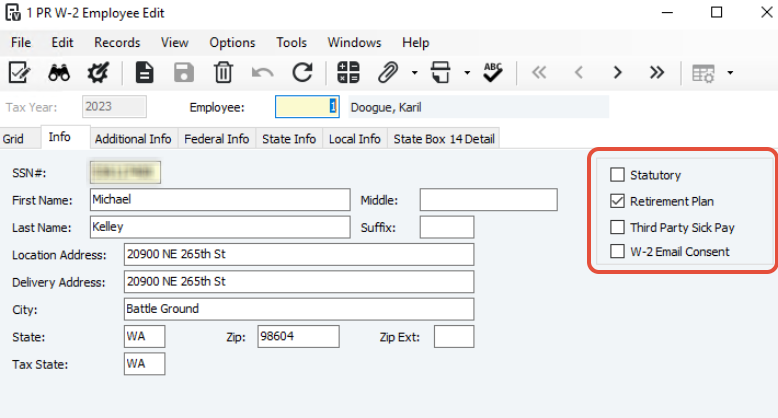
6b. Edit Employee Information
Within the employee record, you can edit fields as needed.
Changes affect only the Vista W-2 tables, not Aatrix data.
Check boxes for:
Statutory Employee
Retirement Plan
Third-Party Sick Pay
The Add’l Info tab is for Guam and Puerto Rico (see F1 Help for guidance).
7. Run the W-2 Preview Report
Access the W-2 Preview Report:
From Options → Reports within the W-2 process, or
From Payroll > Reports > PR Reports.
Review or print the report.
Verify Company Totals and Record Counts are accurate.


8. Launch Aatrix Print and eFile
Navigate to Tasks → Launch Aatrix Print and eFile.

Select W-2/W-3 and click Continue.

This opens the Aatrix W-2/1099 Preparer form.
In Aatrix:
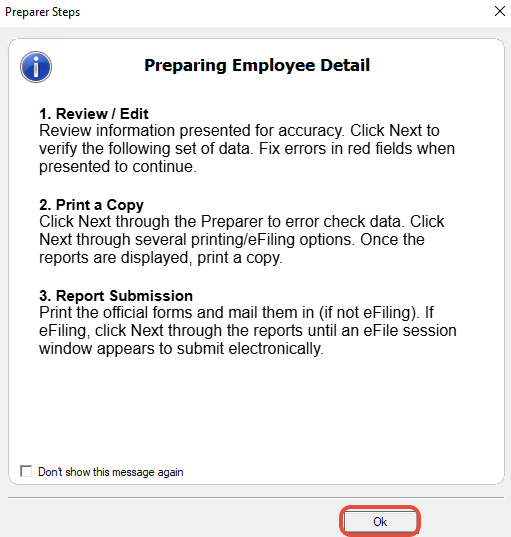
Verify all Employee Information.
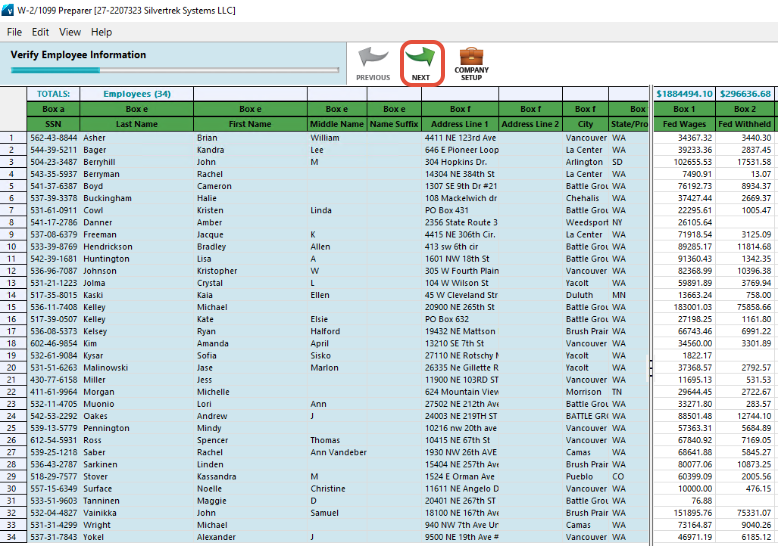
Records with incomplete data appear in red.
Continue clicking Next through the verification process until W-2s are ready.
Final Options:
Enroll in Aatrix eFile to submit electronically, or
Print W-2s directly through Aatrix for mailing/distribution.
Was this article helpful?
That’s Great!
Thank you for your feedback
Sorry! We couldn't be helpful
Thank you for your feedback
Feedback sent
We appreciate your effort and will try to fix the article