JB Progress Billing Procedure
Objective
This SOP outlines the steps to create and manage JB Progress Billing effectively within the job billing module.
Key Steps
1. Accessing JB Progress Billing 0:01

Navigate to the job billing module.
Locate 'JB Progress Billing' and double-click to open.
2. Selecting Bill Month and Bill Number 0:24

Choose the Bill Month (e.g., May 2025).
Note the Bill Number for future reference, as it helps in searching reports.
3. Creating a New Bill 1:01

Click the plus symbol to create a new bill.
Auto-generate the next invoice number.
4. Selecting Contract and Invoice Details 1:20

Press F4 to select the contract, which pulls in the customer details.
Ensure the application number is correct (e.g., Application Number 2).
Fill in the Invoice Description (e.g., 'Second job bill for this contract').
5. Entering Billing Information 1:50

Input the billing address information as per the JC contract.
Set the invoice date (e.g., 10/29/25) and ensure due date auto-populates from AR customer pay terms.
6. Saving the Bill 2:14
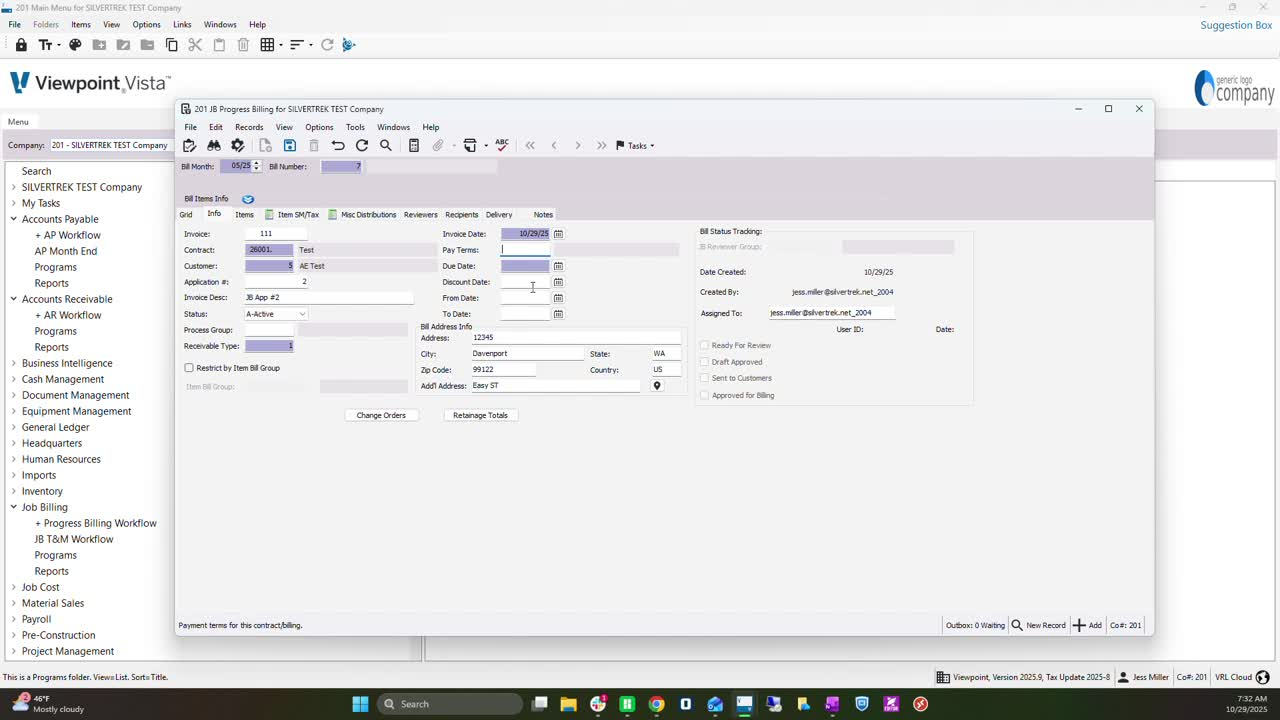
Click the blue floppy disk icon to save your work.
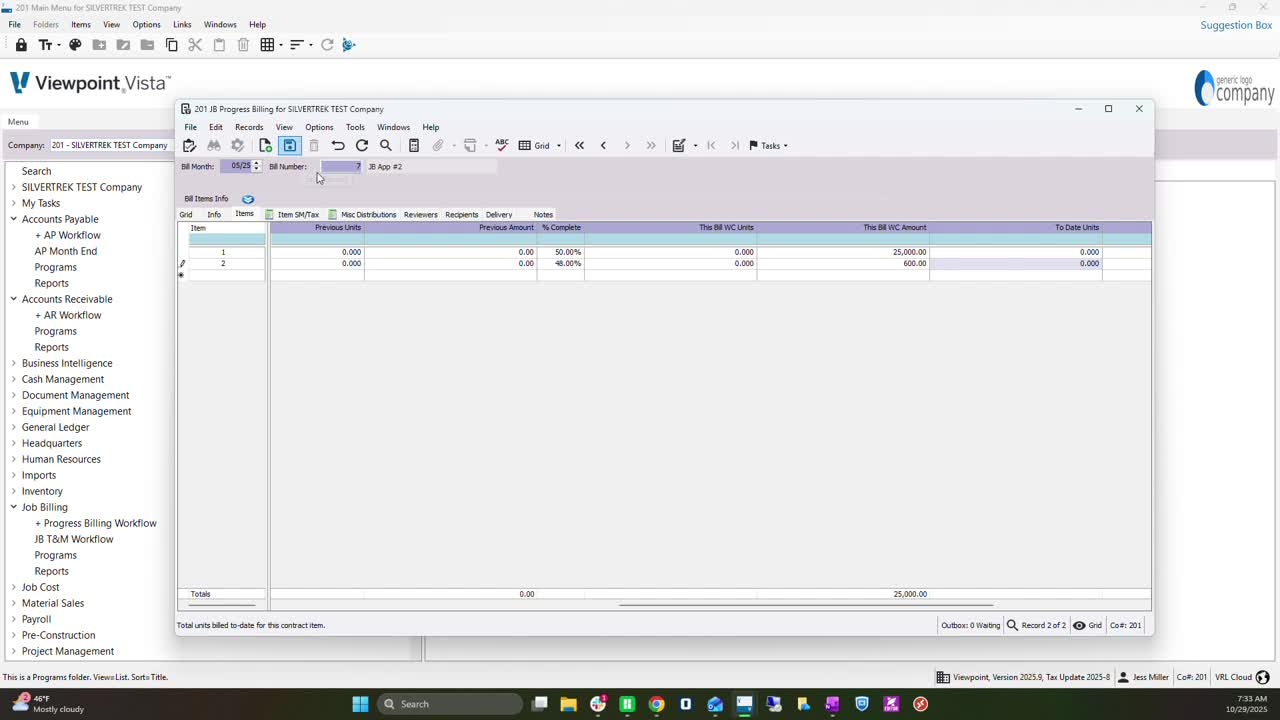
7. Entering Billing Items 2:26

Go to the items tab.
Enter the complete percentage or total bill amount (e.g., 100% or 50%).
If billing by unit, fill out the unit price accordingly.
8. Finalizing the Bill 3:21
After entering all necessary details, hit save and exit.
9. Accessing JB Interface 3:36

Locate the created bill in the JB interface.
10. Deleting User from Bill 3:50

Remove the user from the bill to allow others to access it.
11. Interface the Bill 4:00

Select the checkbox for the bill you want to interface.
Click 'Post' to proceed.
12. Validating and Previewing Reports 4:08

Validate the bill and check for errors.
If errors are present, preview the error list to resolve issues.
13. Completing the Posting Process 4:50

Confirm that the batch was successfully updated.
Close the interface.
Cautionary Notes
Always double-check the Bill Number and Invoice Date to avoid discrepancies.
Ensure that the correct contract is selected to prevent billing errors.
Tips for Efficiency
Familiarize yourself with the grid layout to quickly find invoice and bill numbers.
Use keyboard shortcuts (like F4) to speed up the process of selecting contracts.
Link to Loom
https://loom.com/share/db99bbfa4d574740b48946a2522eecf1
Was this article helpful?
That’s Great!
Thank you for your feedback
Sorry! We couldn't be helpful
Thank you for your feedback
Feedback sent
We appreciate your effort and will try to fix the article