AP Payment Processing
Process for AP Payments:
1. Click the "+" next to the dashboard tab in the upper left hand corner of the screen.

2. Navigate to Payment Processing (Accounts Payable > Data Entry > Payment Processing)
 3. The processing group will auto fill.
4. Follow the green buttons in the column toward the left side of the screen. This begins with "Payment Selection."
 5. When this window pops up, click F4 and enter. There should be one option that is the specific company you're working in. Choose that company.

6. Select the appropriate payment method.

7. Assign the appropriate bank account upon which the invoice (s) will be paid by clicking F4 and "enter" in the highlighted fields. Then click continue.

8. Click Search to get a window that allows you to filter the items that pull in. Click OK.


9. Once the items pull in, there will be a button that says "Pay." Click that button and the outstanding balance will change to zero and the full payment amount will autofill into the "make payment" field. If you're making a partial payment, edit the amount accordingly.

 10. Click the green "Pre-Payment Register" button after selecting what you want to pay.
11. Click Preview.
 12. The pre-payment register report will pop up. Click archive to save this report within spectrum.

13. Click continue.
14. A window will pop up that says "completed successfully." Click OK.
15. Close out of the Pre-Payment Register tab.
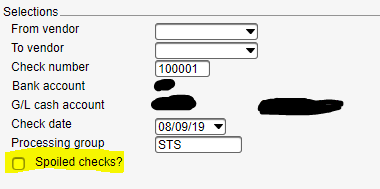
16. Click the "Print Checks" button that is the next green button in the sequence.

17. Check the box next to spoiled checks if you want to be able to reuse the check number in the event that something goes wrong while printing the check.
18. Click the green "preview" button on the top left of the screen.
19. The AP/Check Print report will pop up. Click the archive button.
20. Click Continue, then OK.
21. Close out of the report.
22. Click the green "Register/Update" button at the bottom of the list.
 23. Click the green "preview" button.
24. The "Payment Register" report will pop up. Click archive to save the report.
25. Click continue
26. Click OK after the report has been saved successfully.
27. Close out of the report.
28. Click Continue
29. Choose the appropriate transaction type
 30. Click the green "preview" button
31. The "Payments G/L Detal by GL Account" report will pull in. Click the archive button to save the report.
32. Click continue and OK.
33. Close out of the report.
34. Click continue and OK.
35. The payment has been processed!